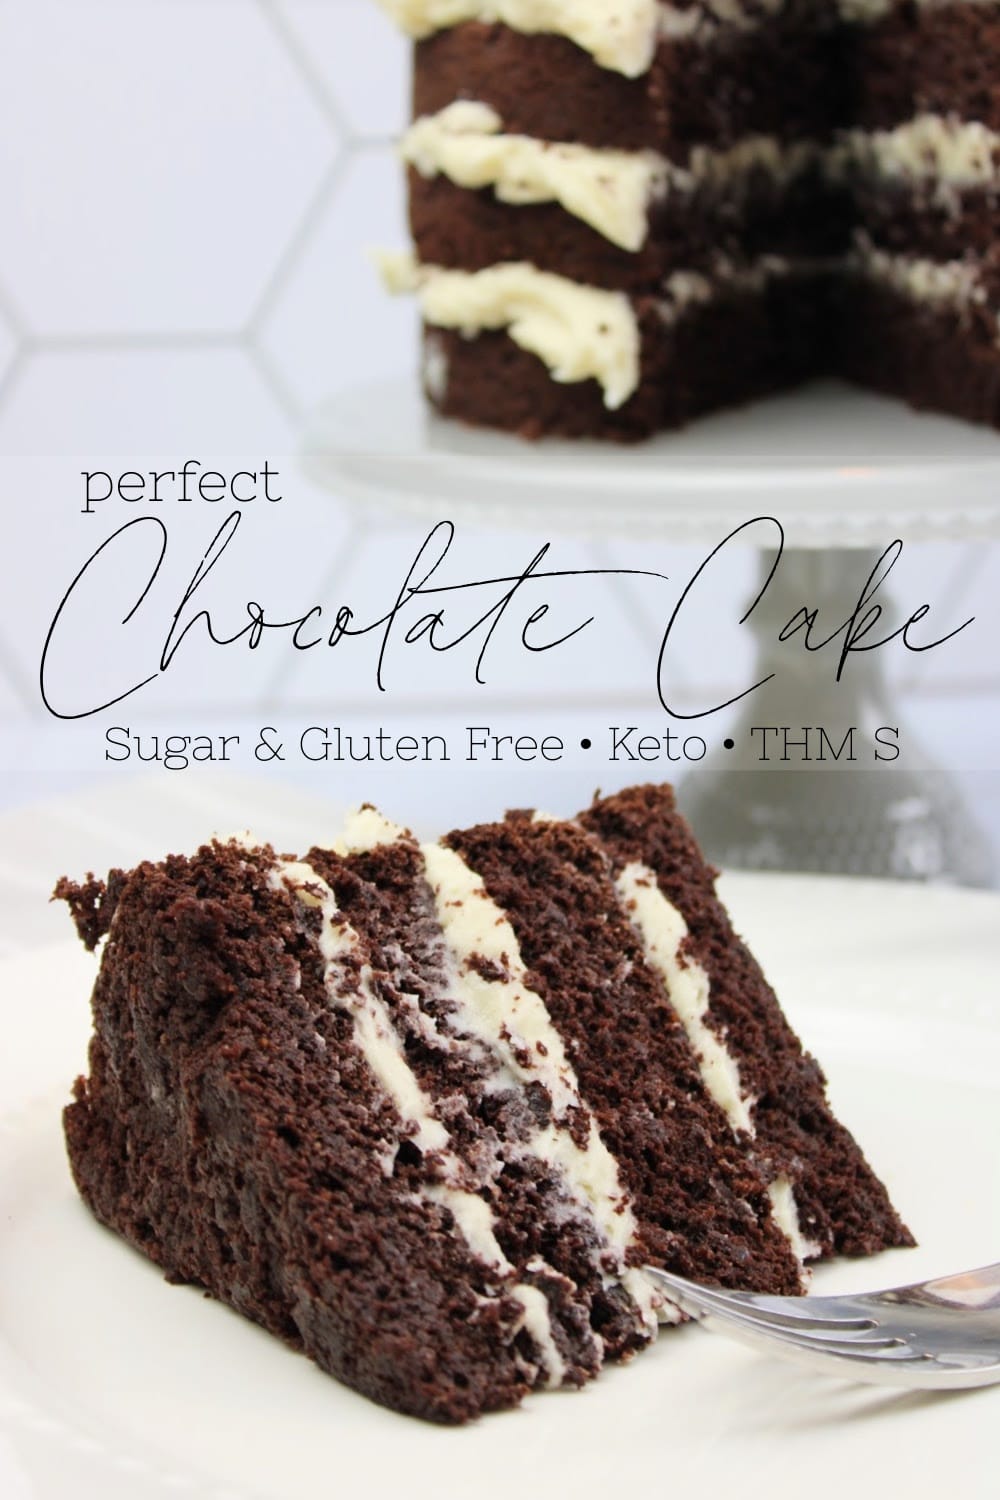
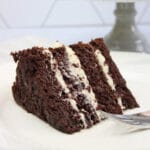
Use this recipe to make the most Perfect Chocolate Cake (Sugar-Free & Gluten-Free). It’s true to taste and texture without the sugar or gluten!
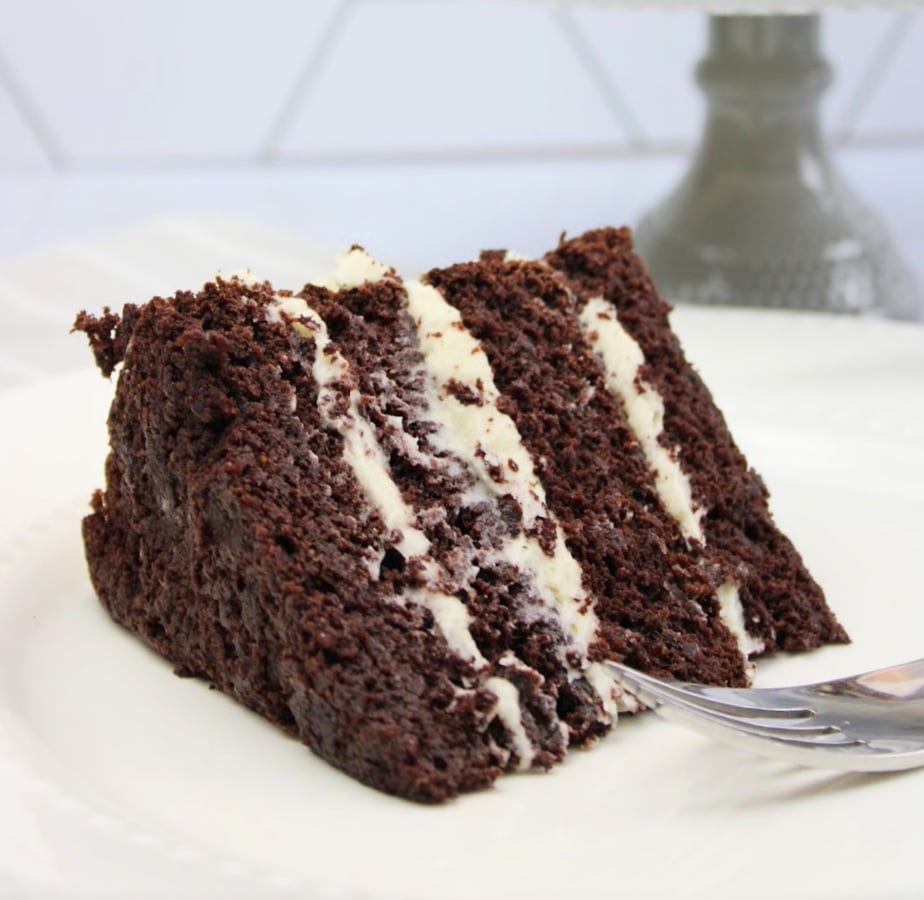
You guys, I’m so excited to share this chocolate cake with you because I am certain y’all have tasted and been disappointed by lame “healthy” chocolate cakes just like I have. I’ve had gluten-free chocolate cake, sugar-free zucchini chocolate cake and other chocolate cakes that tasted like fiber sat next to a chocolate bar in the cupboard and now thinks it’s chocolate cake, but none of them have ever hit the spot like a real chocolate cake.
Well, needless to say, this one hit the spot!!! I hope you guys love it as much as my family and I do. I’ve also created an incredible (so humble!) Sugar-Free Buttercream recipe that is PERFECT for this chocolate cake. Click the name in the previous sentence for a link to the buttercream!
This recipe includes a few special ingredients that I use, love, and highly recommend thank the geniuses over at Trim Healthy Mama (THM). They work hard to create healthy products to replace the garbage products in most food these days.
Their sugar replacement, Gentle Sweet is my go-to choice for baking because you get all the sweetness with none of the sugar or funky sugar replacement aftertaste. They even created an option for dog owners without the xylitol in the event your dog gets into the bag or into something you baked with it, it won’t be toxic to them. I use the one with xylitol because I don’t have dogs and the xylitol helps prevent crystallization.
My other go-to for a brilliant flour replacement is also a THM product called Baking Blend. So far I haven’t been able to find anything that even remotely bakes or tastes like flour until I found Baking Blend. Nothing has come before it or since that even compares.
The products are linked above and in the ingredients list below if you are interested in purchasing them.
Perfect Chocolate Cake (Sugar-Free & Gluten-Free)
Yield:
2 – Tall 6 inch cakes. The cakes are all enough to make 2 layers each.
Tools:
2 – 6″ cake pans
Cooling Rack
Parchment Paper
Wilton Baking Spray
Ingredients:
2 sticks – Salted Butter (room temperature)
1 ½ cups – Gentle Sweet
5 – Eggs (room temperature)
3 cups – Baking Blend
2 tsp – Baking Powder
1 ½ tsp – Baking Soda
1 tsp – Xanthan Gum
1 cup – Cocoa Powder
2 cups – Boiling Water
Instructions
Step One:
With the paddle attachment, cream the gentle sweet and the room temp butter together until it’s light and fluffy. Scrape the butter and gentle sweet mixture off of the sides of the bowl and the paddle. At this point, you want to switch from the paddle attachment to the whisk attachment. 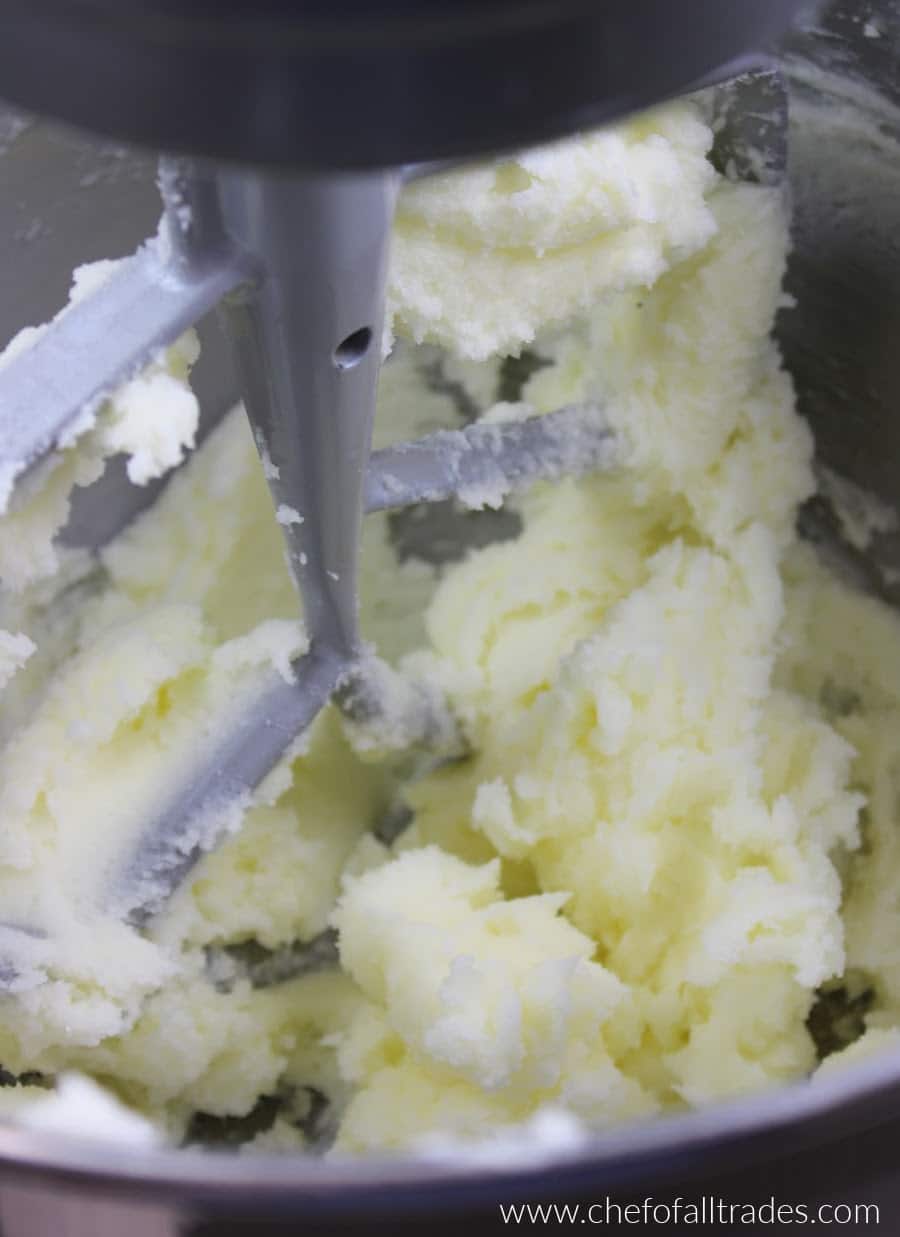
Step Two:
Add the room temp eggs one to two at a time allowing the previously added eggs to become completely incorporated. Stop mixing as soon as all of the eggs are incorporated.
It’s important for all the ingredients to be room temp because when you’re mixing fats together, such as egg yolks and butter, it’s a lot easier for them to emulsify when they are the same temp. If you try mixing different fats together that are different temps you, may notice you have a lumpy batter. I see you, I am you, the one who thinks, “how much difference does it really make?” Just trust me LOL!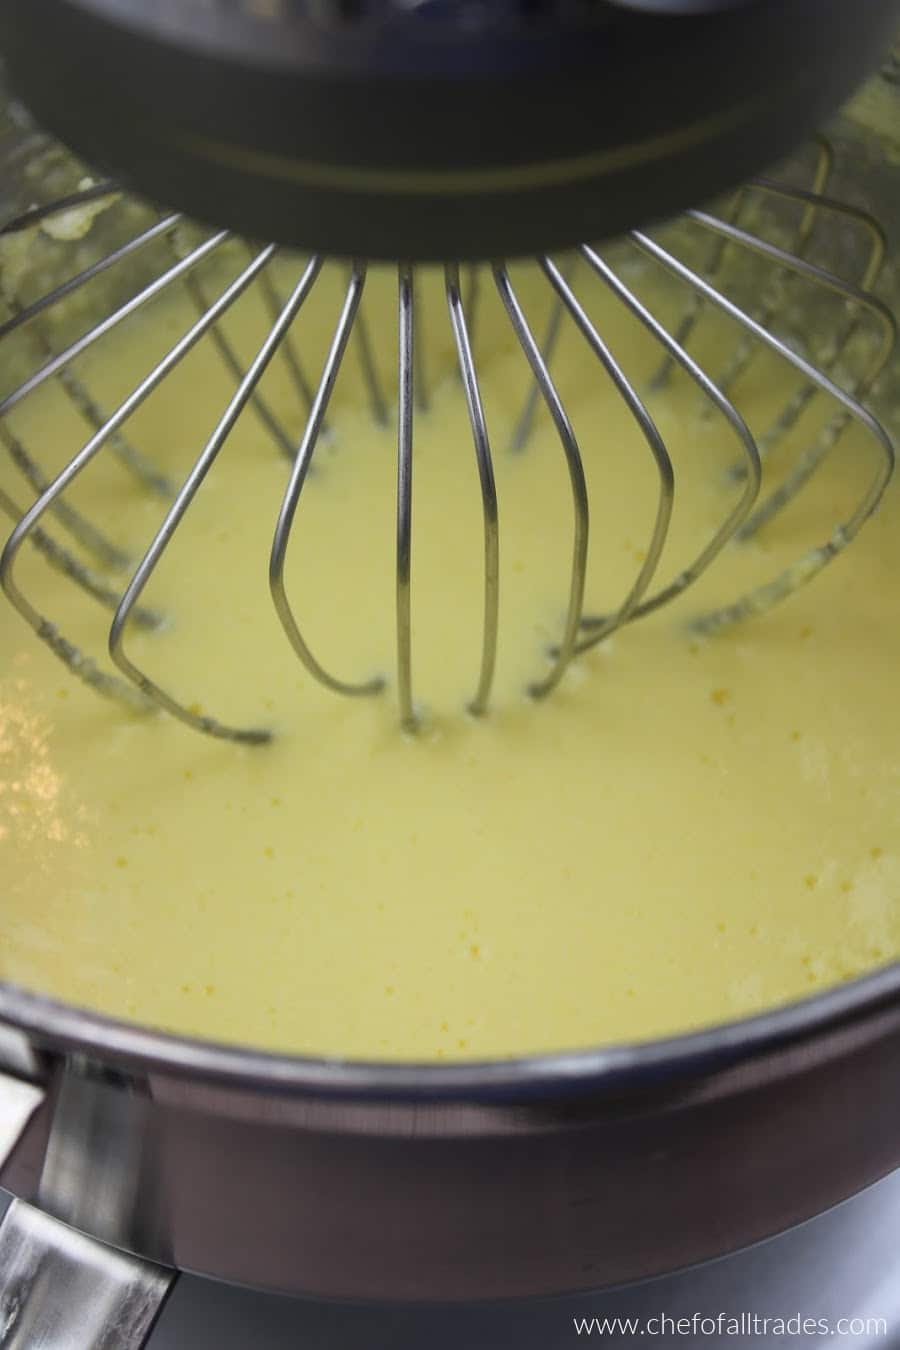
Step Three:
In a mixing bowl, combine the baking blend, baking powder, baking soda, and Xanthan Gum. Mix them together until very well incorporated. If you have any big pockets of Xanthan Gum it might cause clumping. Are you catching on that we want to avoid the clumping? That is our main objective!
Step Four:
Boil a little more than 2 cups (to account for evaporation) of water. Measure out 2 cups of water and whisk it into the cocoa powder until it is…you guessed it…smooth and clump-free. 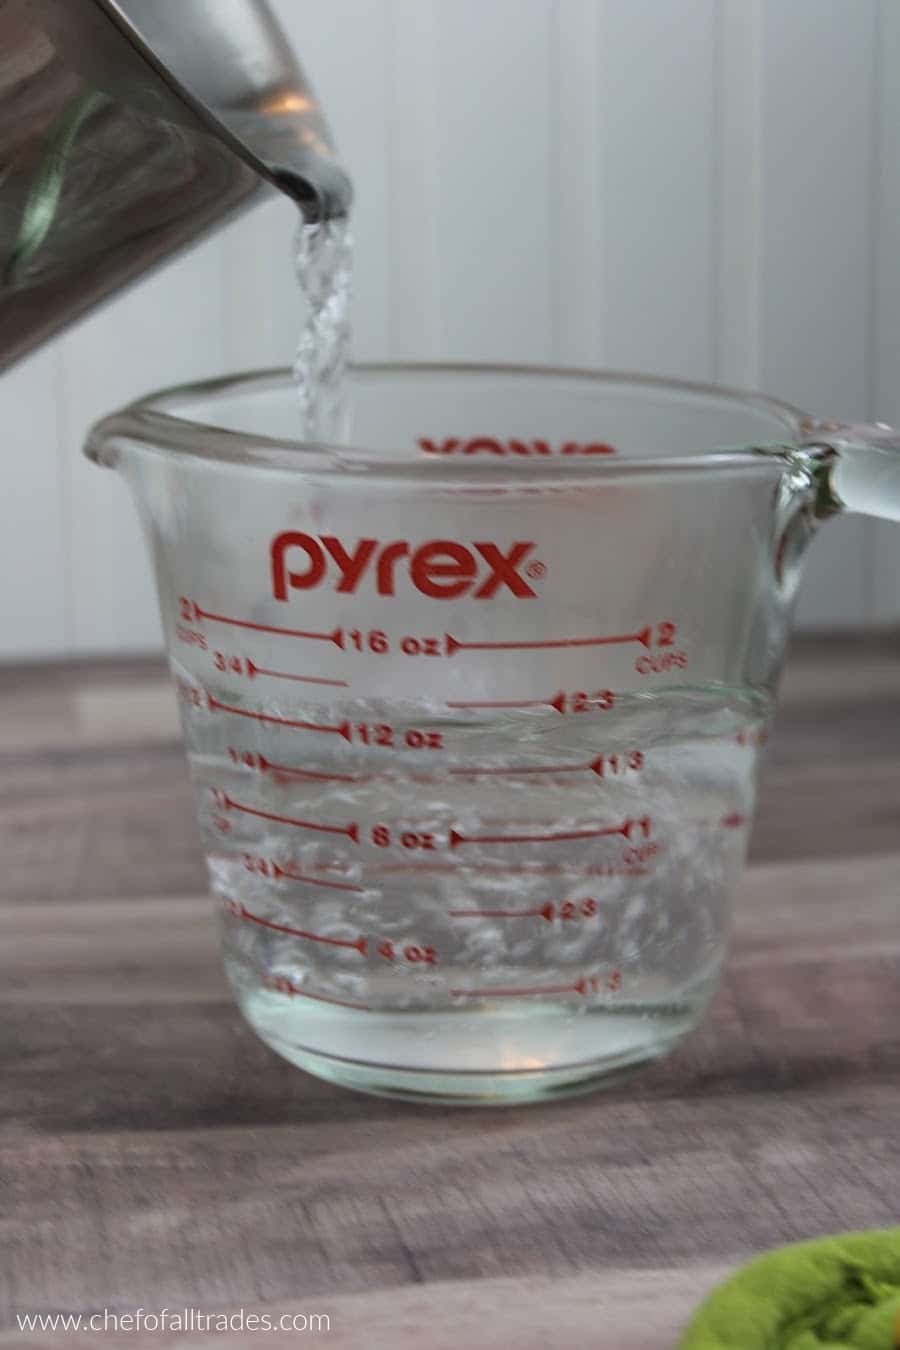

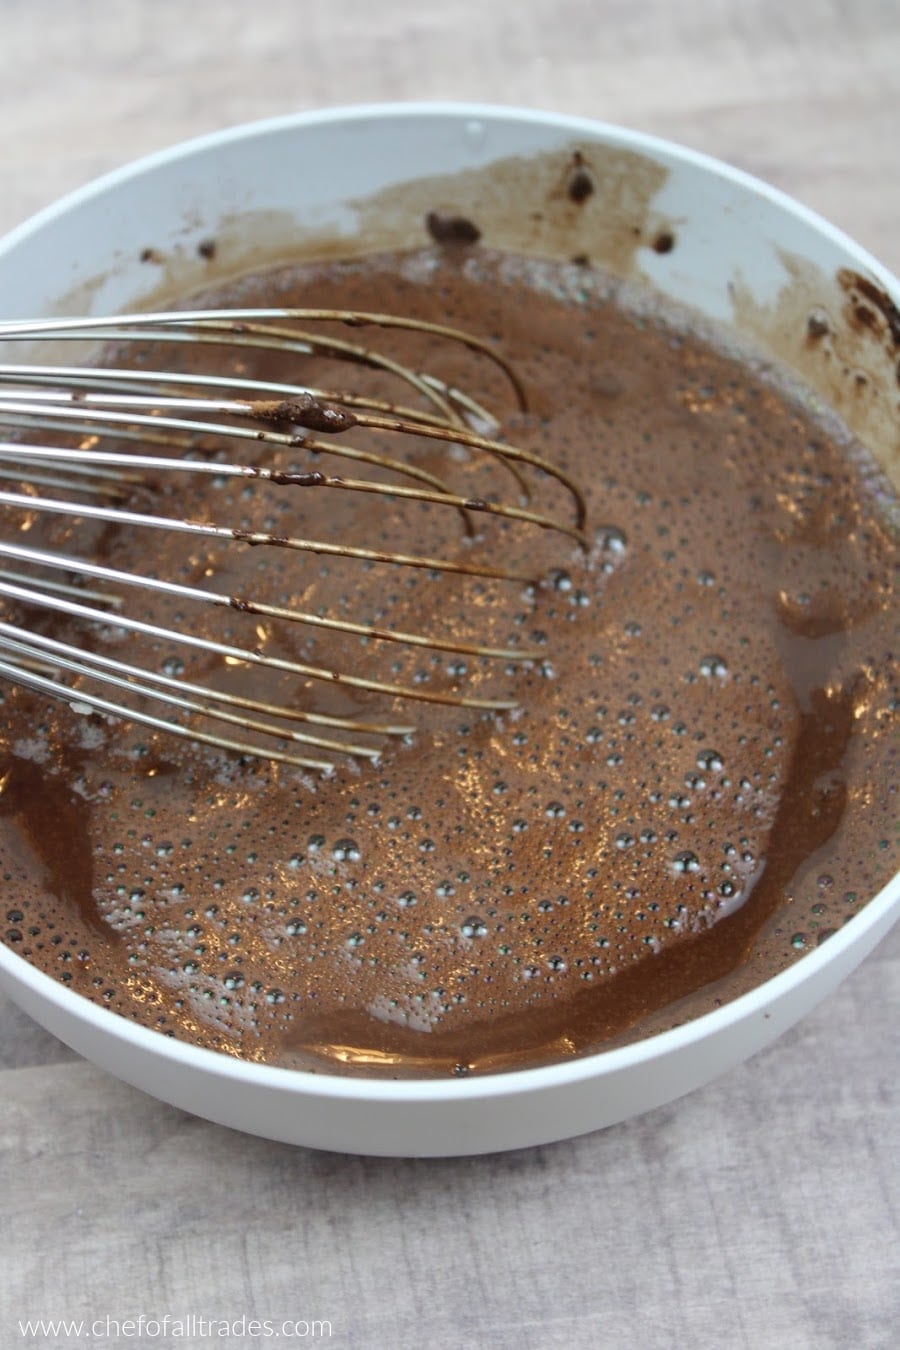
Step Five:
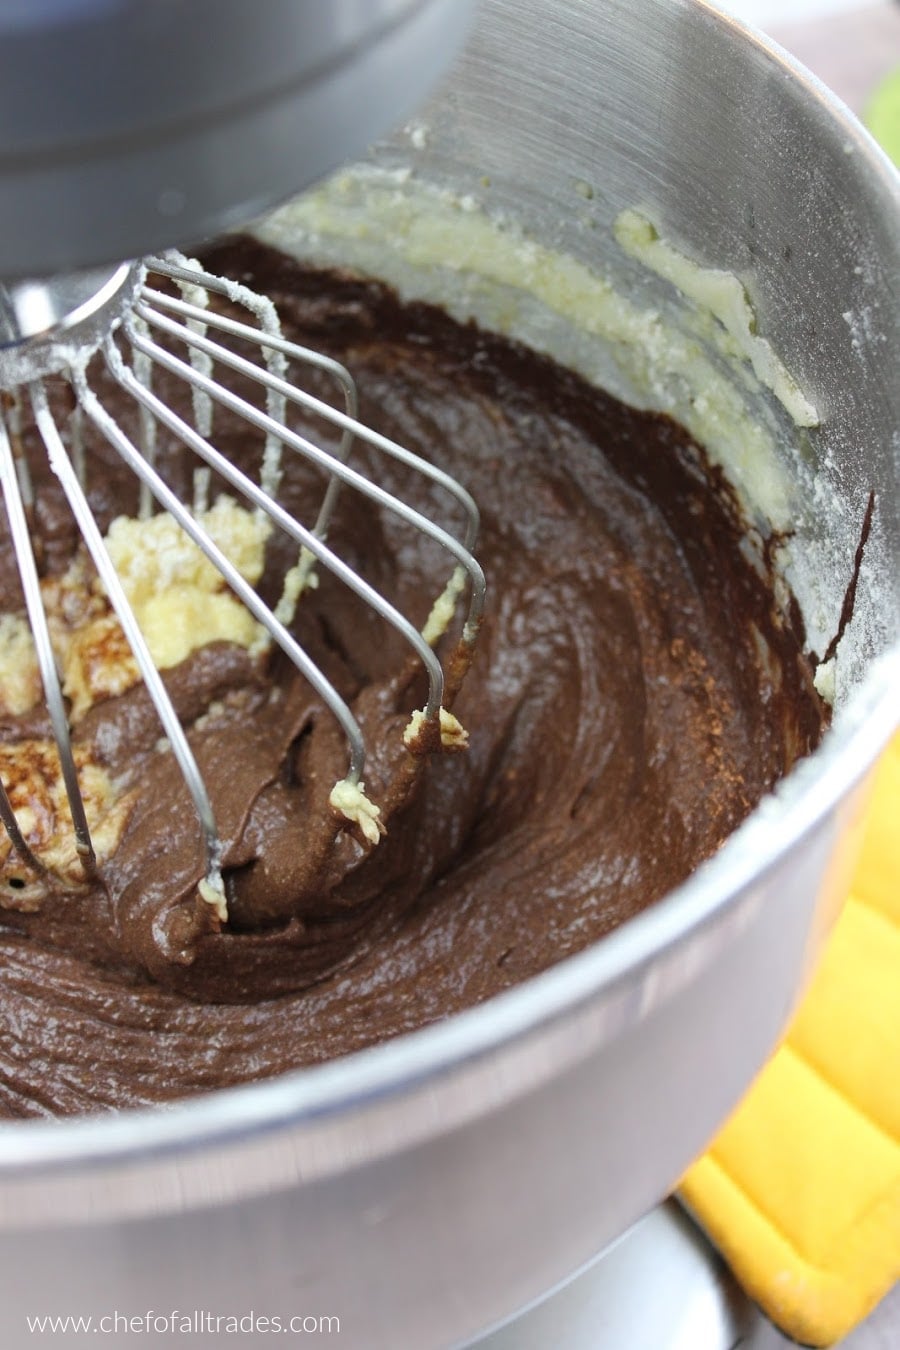
With the mixer on a low speed add the baking blend mixture and the cocoa mixture in an alternating fashion beginning and ending with the baking blend mixture. Allow each one to incorporate before adding the next. Scrape the sides of the bowl.
Mix one final time on medium-high speed for about 30 seconds to make sure everything you scraped off the sides of the bowl is all mixed in. 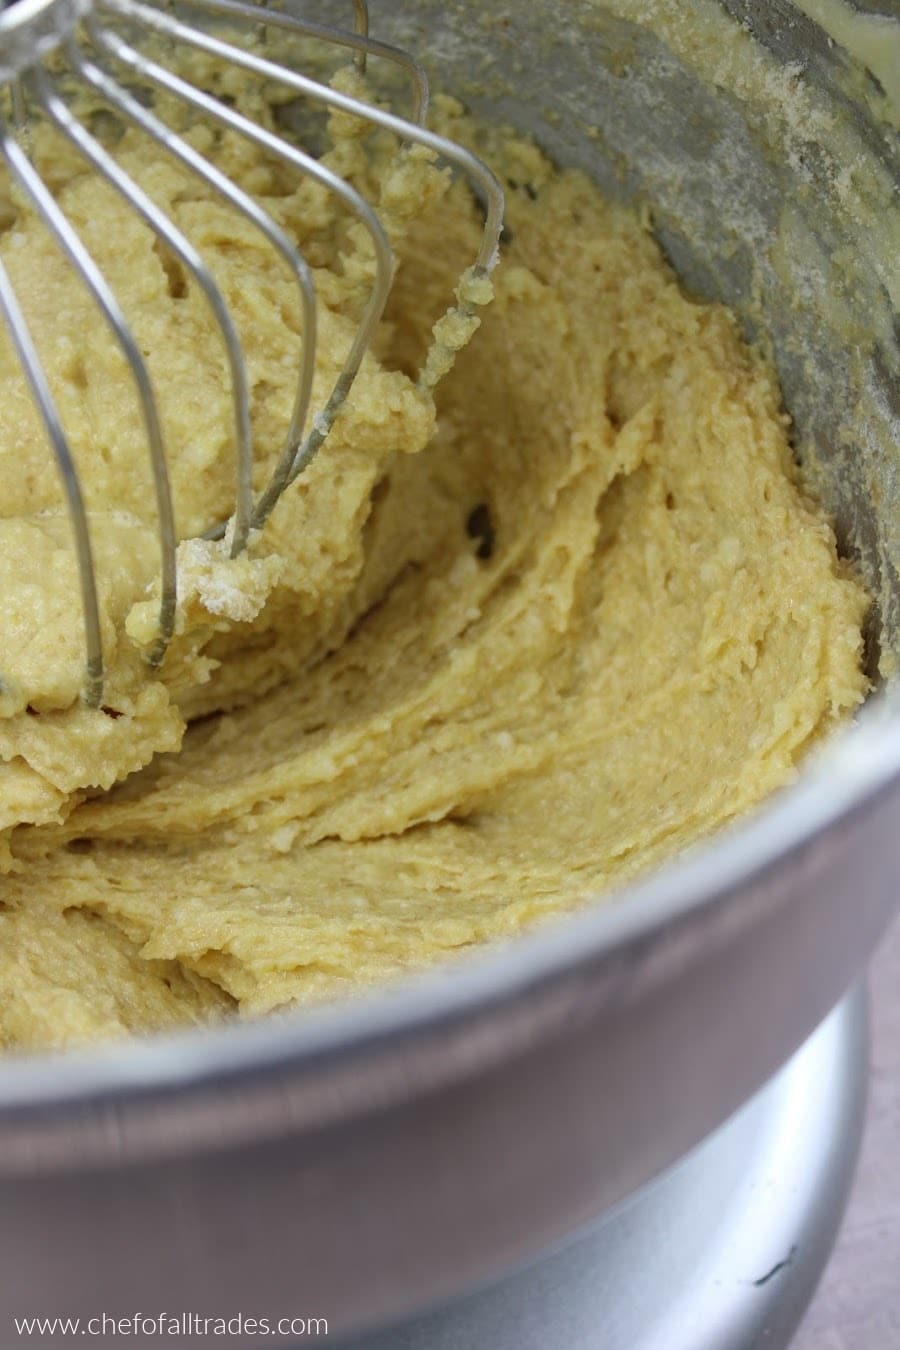
Step Six:
Prepare the pans. Trace around the bottom of each cake pan on a piece of parchment paper. 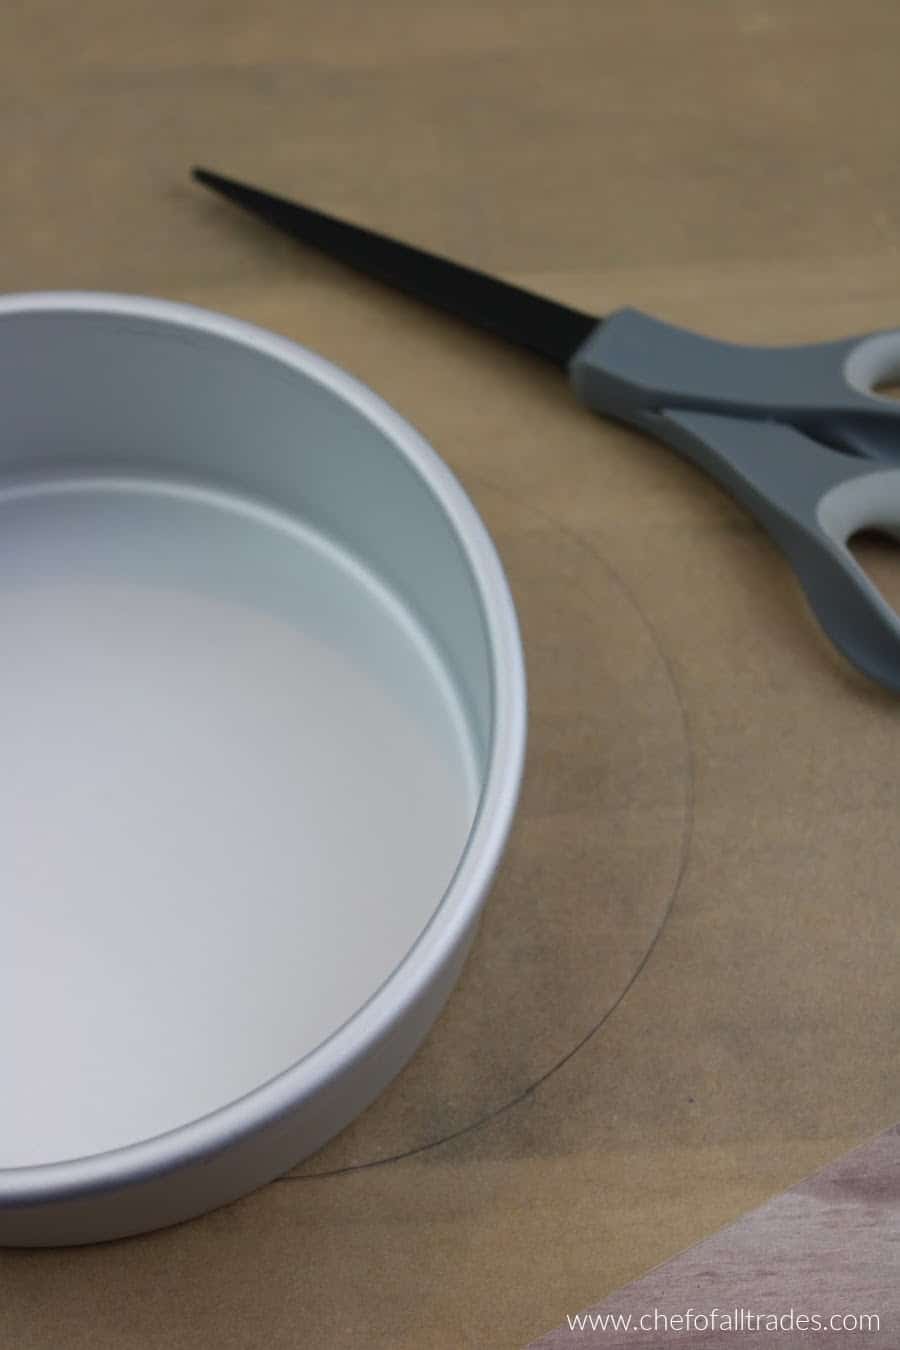
Fold the traced circle in half and cut it out.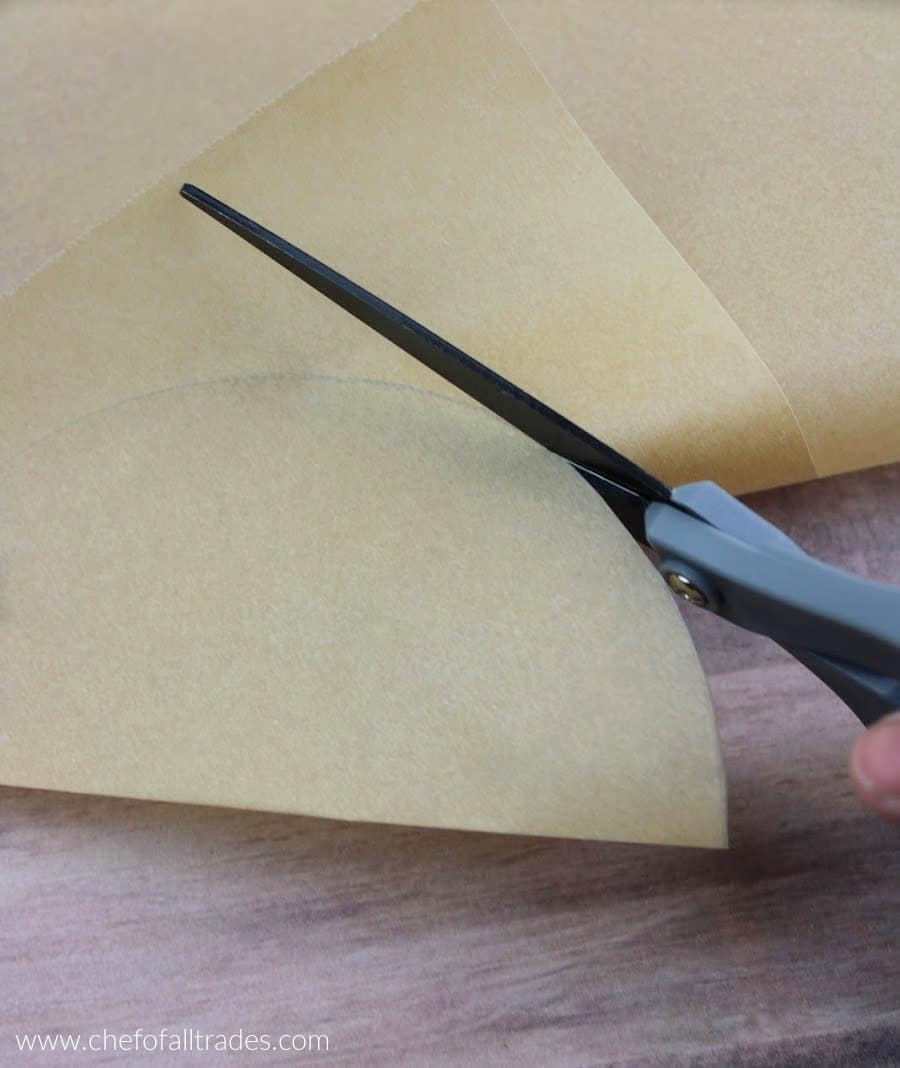
Spray the pan with nonstick cake pan spray then place the circle of parchment in the bottom of the pan. 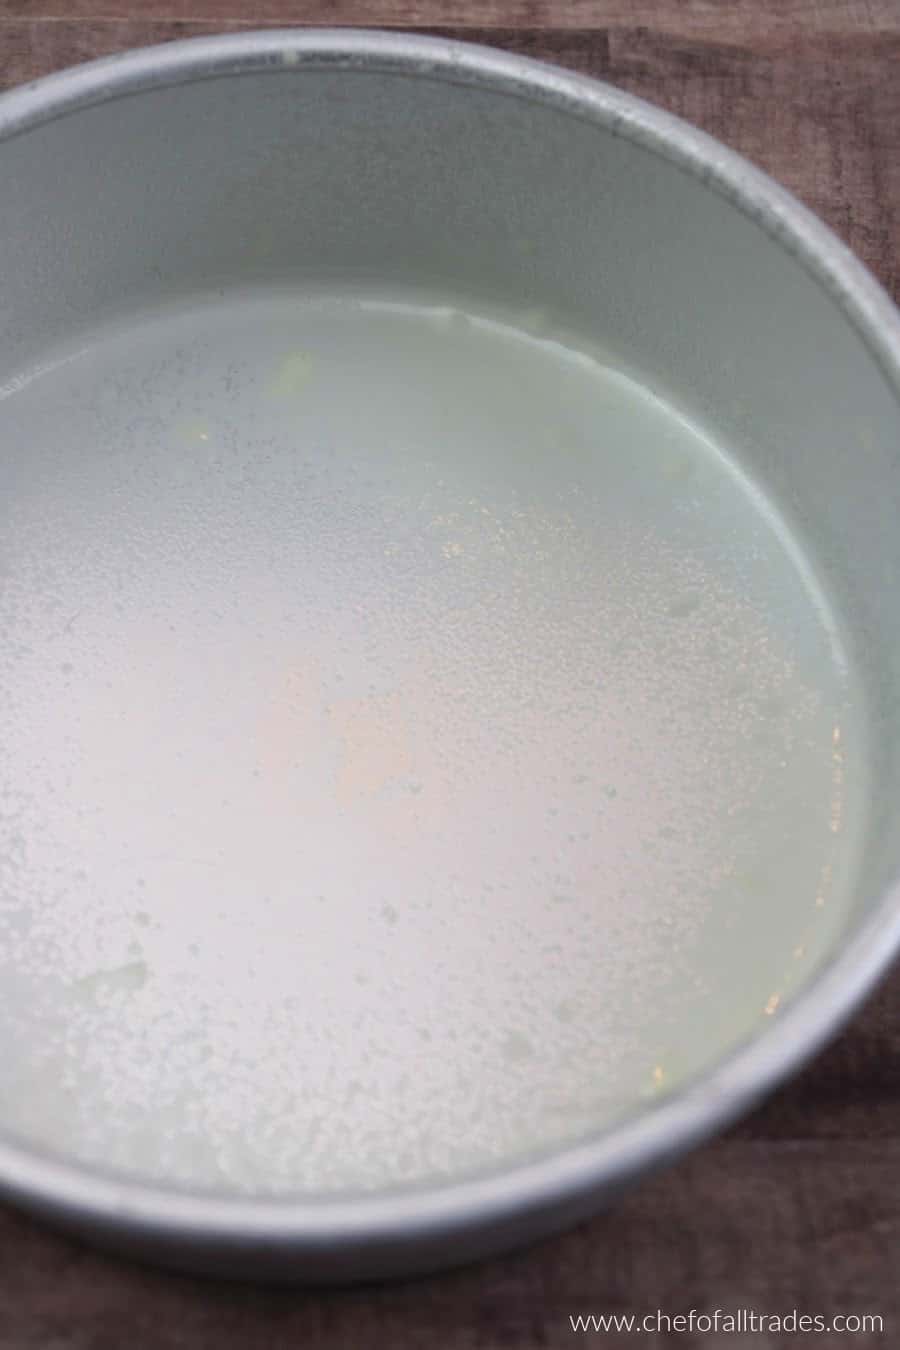

Step Seven:
Evenly divide the cake batter into the cake pans. Bake them for 40-50 mins at 350º. 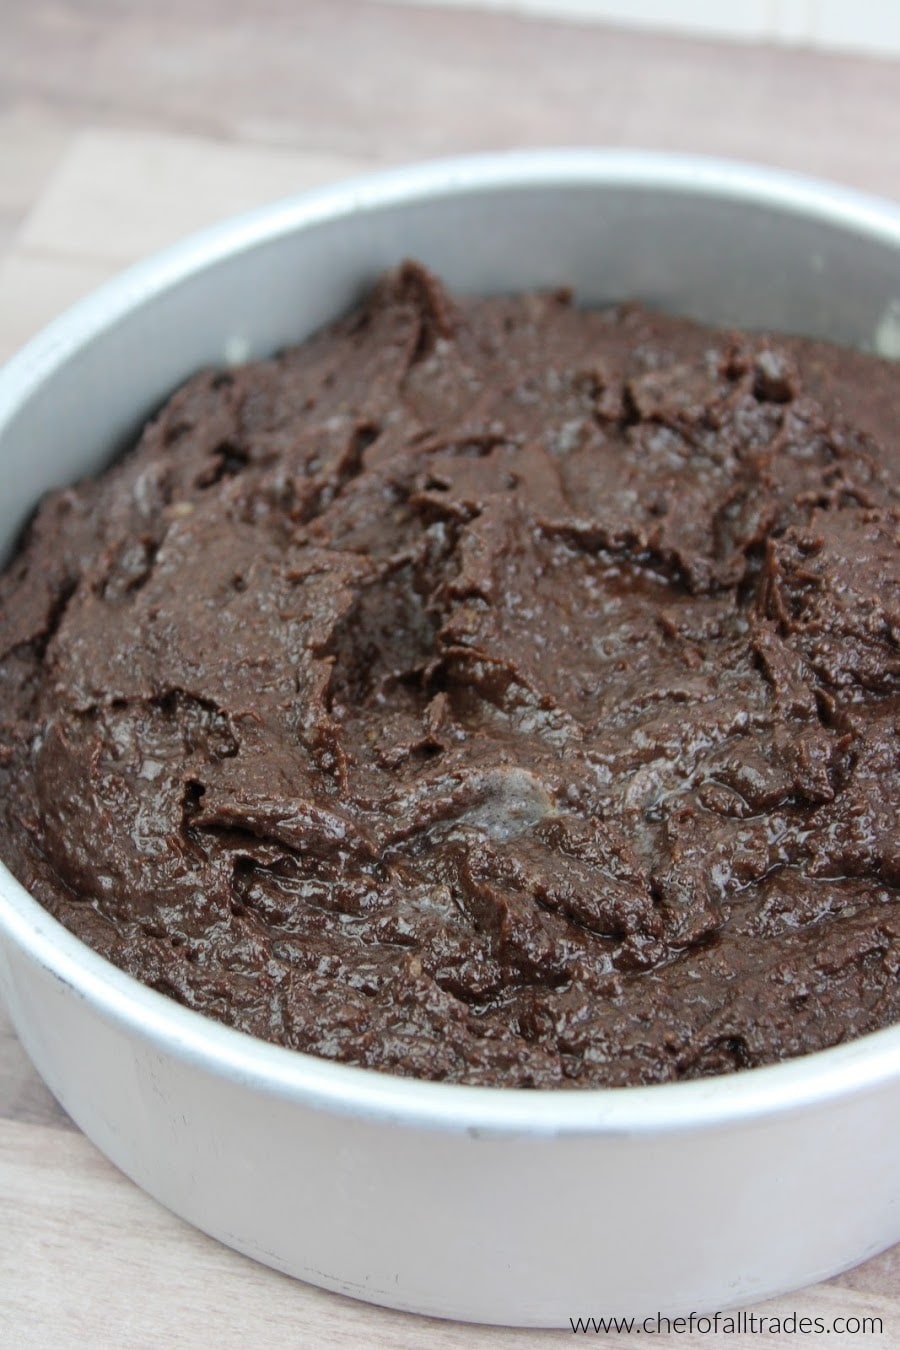
Step Eight:
Once the cakes are done allow them to cool for 10-20 mins before turning them out of the pans. Run a butter knife or icing spatula between the pan and the cake to release the cake if it’s a little stuck. Flip it out onto a cooling rack and allow to cool completely before decorating it.
Love chocolate? Check out these Chocolate Chip Cookies that are both gluten and sugar-free. Be sure to subscribe to our mailing list to be the first to get new recipes and updates.
Printable Recipe for Perfect Chocolate Cake (Sugar-Free & Gluten-Free):
Perfect Chocolate Cake (Sugar-Free & Gluten-Free)
Equipment
- 2 - 6" cake pans
- Cooling Rack
- Parchment Paper
- Wilton Baking Spray
Ingredients
- 2 sticks Salted Butter room temperature
- 1 ½ cups Gentle Sweet
- 5 Eggs room temperature
- 3 cups Baking Blend
- 2 tsp Baking Powder
- 1 ½ tsp Baking Soda
- 1 tsp Xanthan Gum
- 1 cup Cocoa Powder
- 2 cups Boiling Water
Instructions
- With the paddle attachment, cream the gentle sweet and the room temp butter together until it’s light and fluffy. Scrape the butter and gentle sweet mixture off of the sides of the bowl and the paddle. At this point, you want to switch from the paddle attachment to the whisk attachment.
- Add the room temp eggs one to two at a time allowing the previously added eggs to become completely incorporated. Stop mixing as soon as all of the eggs are incorporated. It’s important for all the ingredients to be room temp because when you’re mixing fats together, such as egg yolks and butter, it’s a lot easier for them to emulsify when they are the same temp. If you try mixing different fats together that are different temps you, may notice you have a lumpy batter. I see you, I am you, the one who thinks, “how much difference does it really make?” Just trust me LOL!
- In a mixing bowl, combine the baking blend, baking powder, baking soda, and Xanthan Gum. Mix them together until very well incorporated. If you have any big pockets of Xanthan Gum it might cause clumping. Are you catching on that we want to avoid the clumping? That is our main objective!
- Boil a little more than 2 cups (to account for evaporation) of water. Measure out 2 cups of water and whisk it into the cocoa powder until it is…you guessed it…smooth and clump-free.
- With the mixer on a low speed add the baking blend mixture and the cocoa mixture in an alternating fashion beginning and ending with the baking blend mixture. Allow each one to incorporate before adding the next. Scrape the sides of the bowl. Mix one final time on medium-high speed for about 30 seconds to make sure everything you scraped off the sides of the bowl is all mixed in.
- Prepare the pans. Trace around the bottom of each cake pan on a piece of parchment paper. Fold the traced circle in half and cut it out. Spray the pan with nonstick cake pan spray then place the circle of parchment in the bottom of the pan.
- Evenly divide the cake batter into the cake pans. Bake them for 40-50 mins at 350º.
- Once the cakes are done allow them to cool for 10-20 mins before turning them out of the pans. Run a butter knife or icing spatula between the pan and the cake to release the cake if it’s a little stuck. Flip it out onto a cooling rack and allow to cool completely before decorating it.
Can you use 8 or 9 inch pans or a 9×13 pan?
Hello Kayleen! It just depends on how thick you want the cakes. You can use which ever pan you like and just scale the recipe up or down depending on the thickness you prefer.
I’m not the best with measurement in recipes. I’d like to use coconut oil instead of butter so it’s dairy free. I’m excited to use this recipe for my baby’s first birthday cake!
Hello!! As far as I can tell coconut oil is subbed for butter 1:1 so just replace the butter with the same amount of coconut oil. I did read that it may change the flavor but if you regularly use coconut oil in place of butter you should be good.
I am making this for a baby shower but the baking blend will not get here in time. What is an alternative that would be close?
Hi Jennifer,
I apologize if this posts twice. I am struggling to find where in the instructions it says to blend the butter, eggs and gentle sweet with the cocoa and other dry ingredients mixture. Please help as I have read it over 4 times now! Am I going crazy?!
I would clarify that baking blend is different than baking mix- though yes the name is different- they mean the same thing.
Thank you!!!
Sincerely,
Caroline
Hello. You don’t mix the cocoa powder with the dry ingredients. It’s combined with boiling water and whisked. You mix the other dry ingrdedients together and the wet cocoa powder and dry ingredients and added to the butter and eggs by alternating dry and wet. You begin alternating with dry and end with dry. Hope this helps.
What is the filling? I don’t see a recipe for that.
Thanks