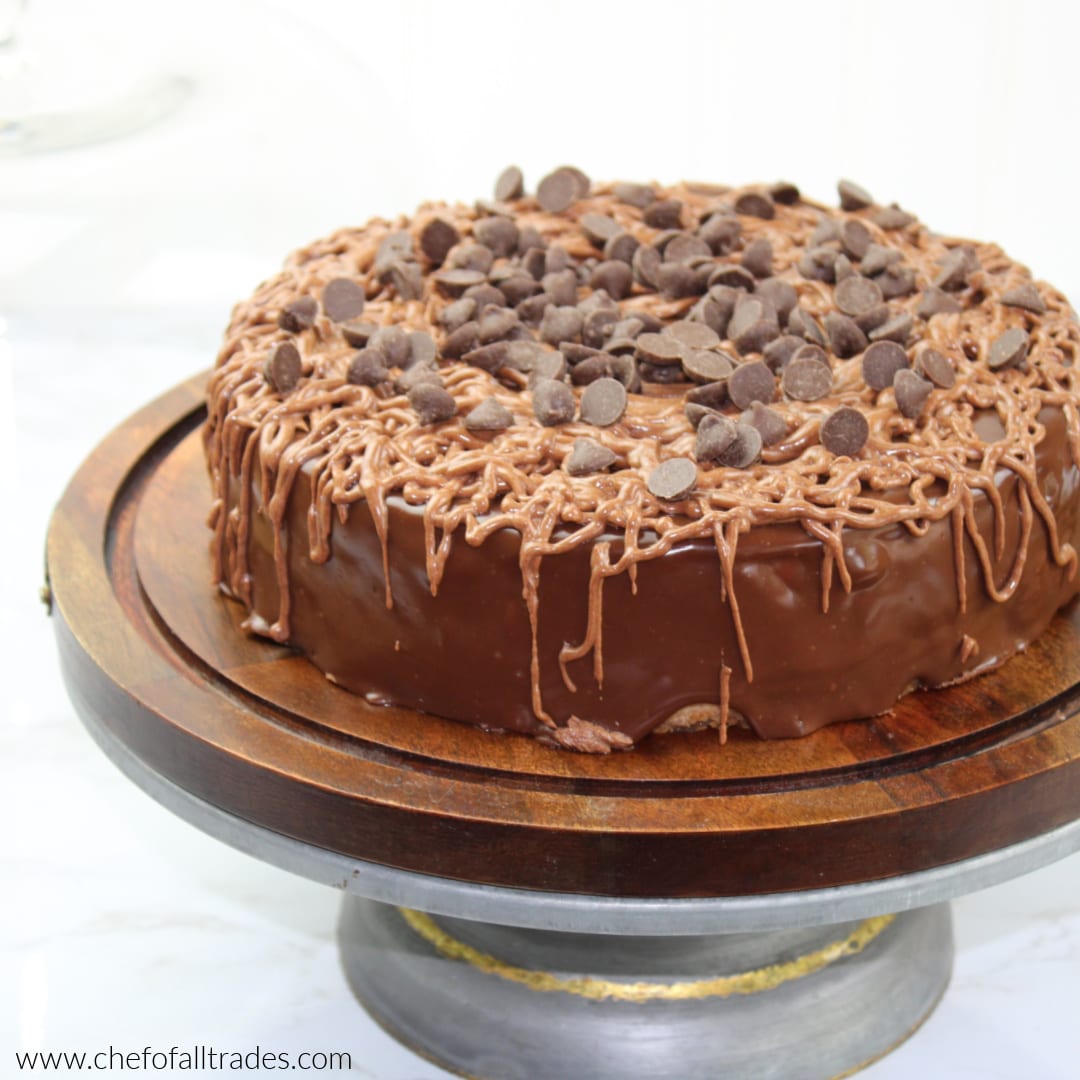
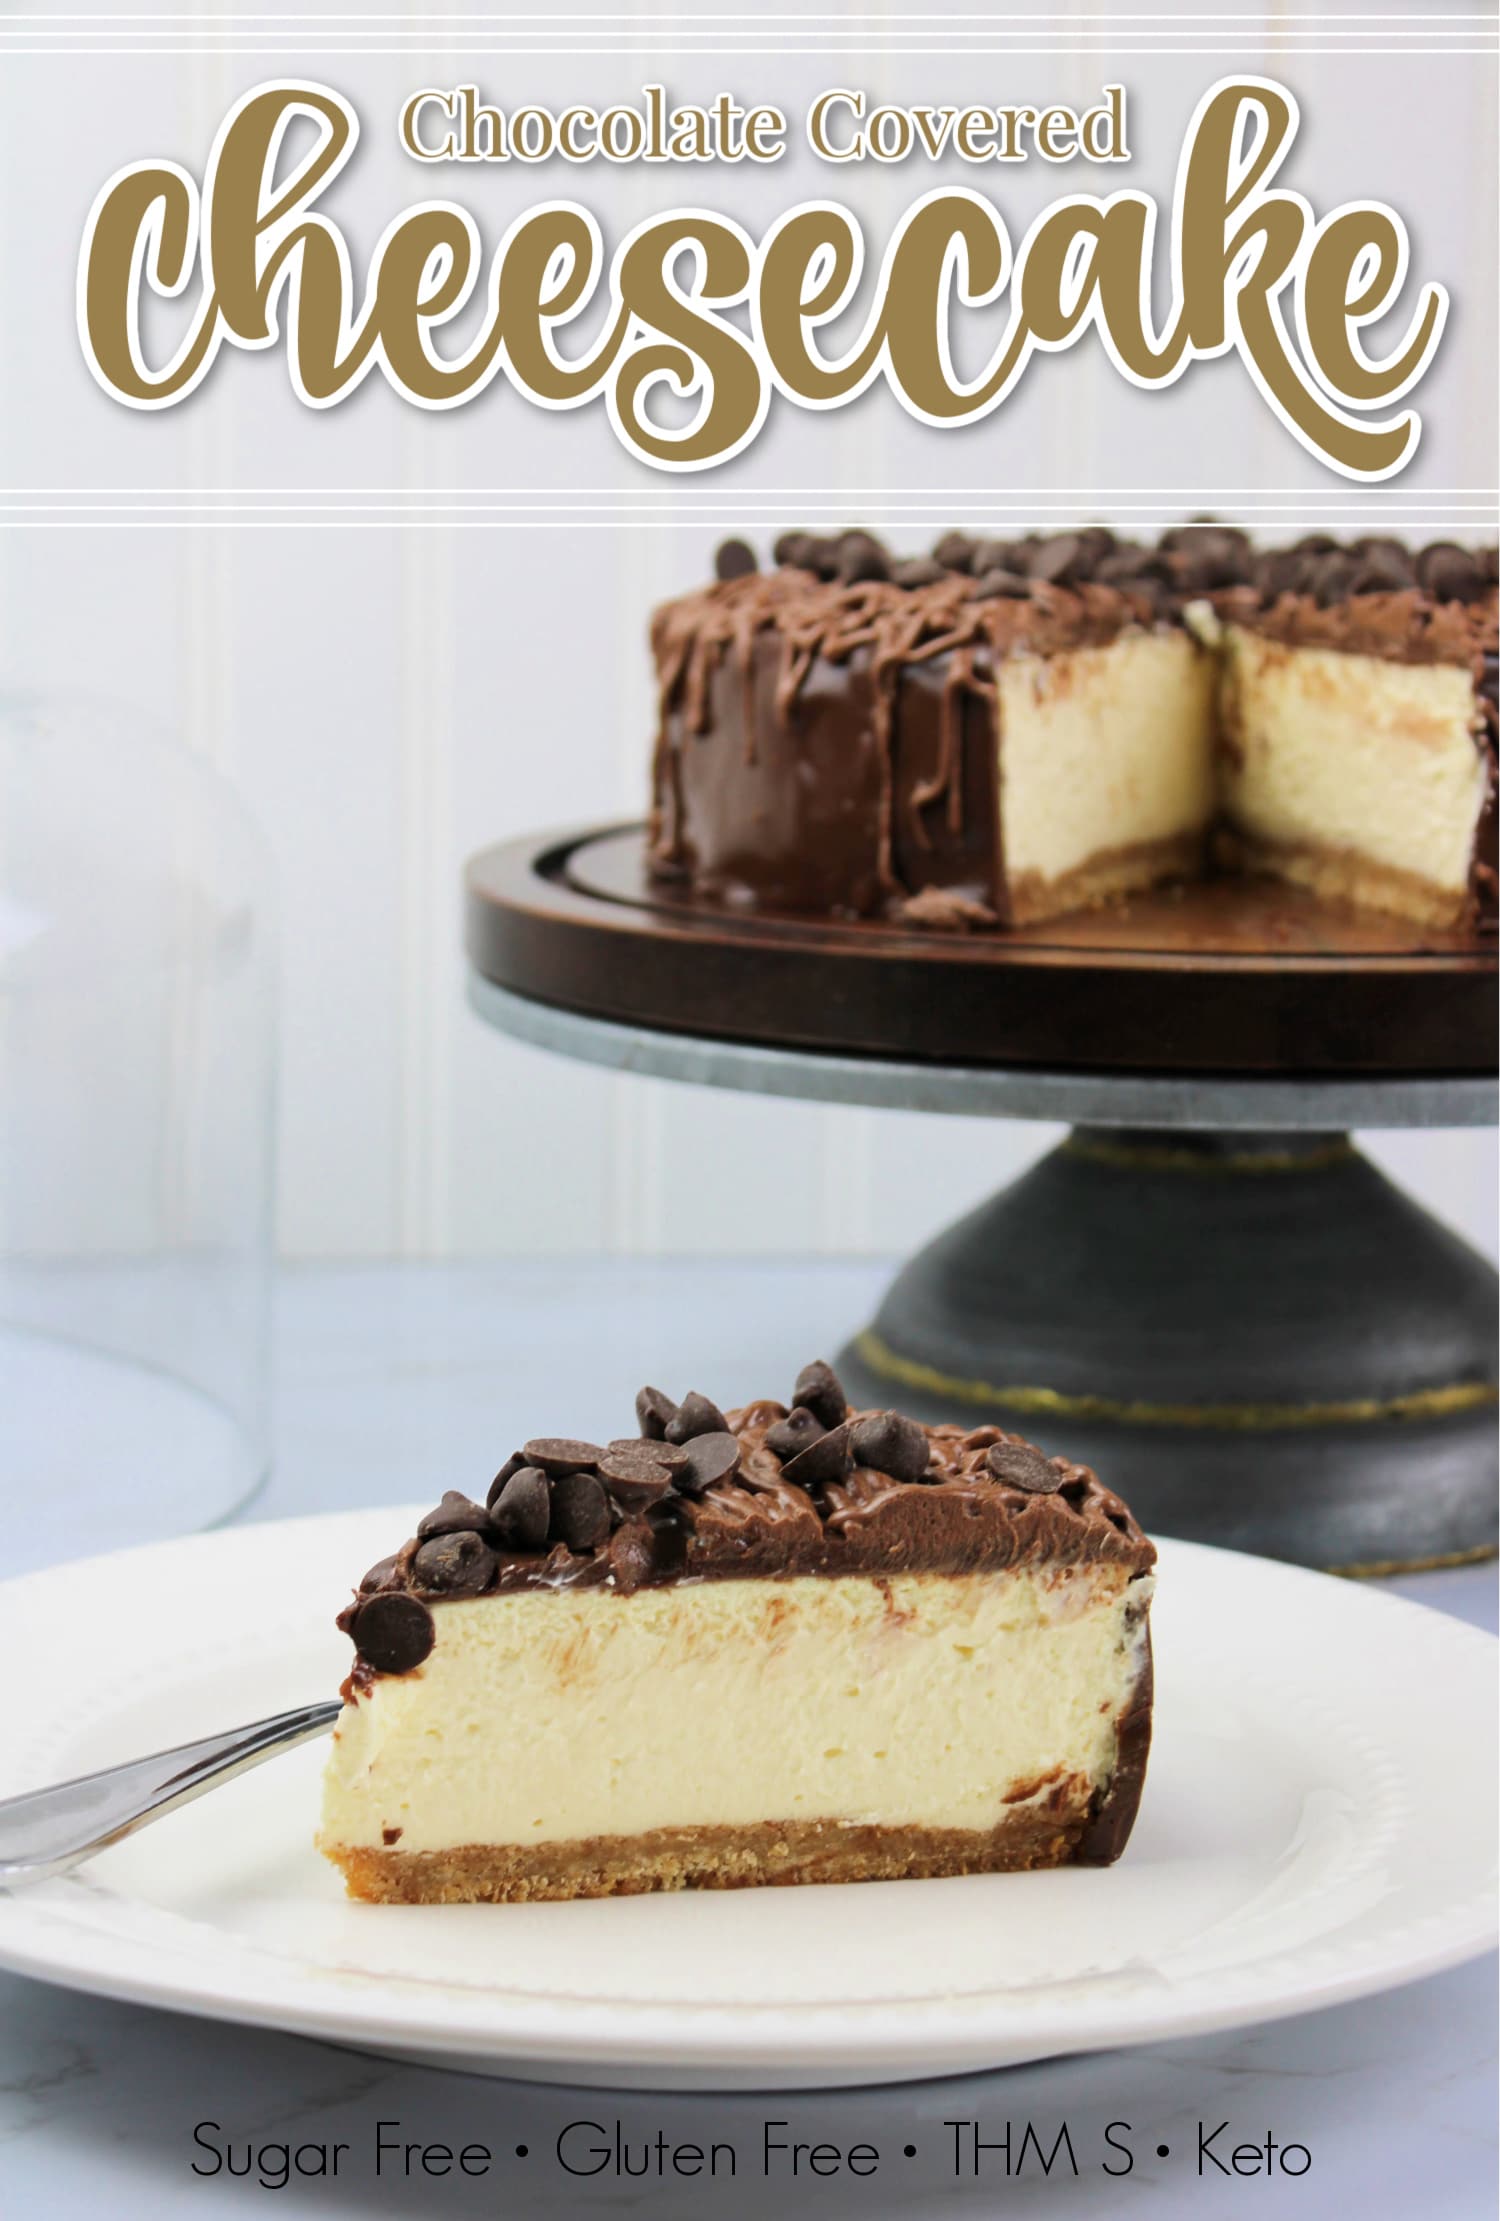
Use this recipe to create the best cheesecake EVER! It’s creamy & delicious, covered in chocolate, easy to make and best of all, fits many different special diets.
Cheesecake is everyone’s favorite right? Okay, I know not everyone, but almost everyone for sure!
This easy cheesecake recipe is my favorite because it’s classic, simple and there’s no way you would ever guess that it’s sugar free. NO WAY! It also the perfect base for whatever topping you want.
My favorite things to do for a dinner party is a cheesecake bar with everything, chocolate, caramel, strawberries, raspberries, whipped cream, and on and on…the list is endless and everyone will get exactly what they love!
Besides it being the perfect dessert, it’s sugar free & gluten free. It’s healthy and my family loves which makes me love it even more!
Providing a healthier lifestyle for my family is always the goal and it’s what keeps me motivated to create these delicious recipes!
If you are looking for a traditional cheesecake without special ingredients, here is a link to the most Delicious New York Style Cheesecake and if you want to decorate in the same way as this sugar free cheesecake, here’s a link to some Silky Smooth Chocolate Ganache which also does not require any special ingredients!
Pro-Tips:
- The key to good cheesecake is a smooth, clump-free batter. Make sure you scrape the bowl after each step to make sure everything gets mixed in.
- If you notice the cheesecake getting too brown, tent a piece of aluminium foil over it being careful to touch the top as little as possible.
Easy Cheesecake Recipe (Sugar Free & Gluten Free)
Yield:
1 – 8 inch Cheesecake
Equipment (click the product for a link to each item):
Stand Mixer
8 inch Cake Pan
9×13 Casserole Pan
Parchment Paper
Ingredients (click the product for a link to the special ingredients):
Crust:
1 cup – Baking Blend
3 tbsp – Gentle Sweet
6 tbsp – Melted Butter
Cheesecake:
1 ½ lbs – ⅓ Less Fat Cream Cheese
1 cup – Gentle Sweet
¼ cup – Sour Cream
½ tsp – Xanthan Gum
1 tbsp – Lemon Juice
2 tsp – Vanilla Extract
3 – Eggs
2 ½ Cups – Heavy Cream
Ganache:
1 bag – Lily’s Milk Chocolate Chips (+ an optional ½ cup to top decorate the cheesecake)
¾ cup – Heavy Cream
1 tbsp – Butter
Instructions
Step One
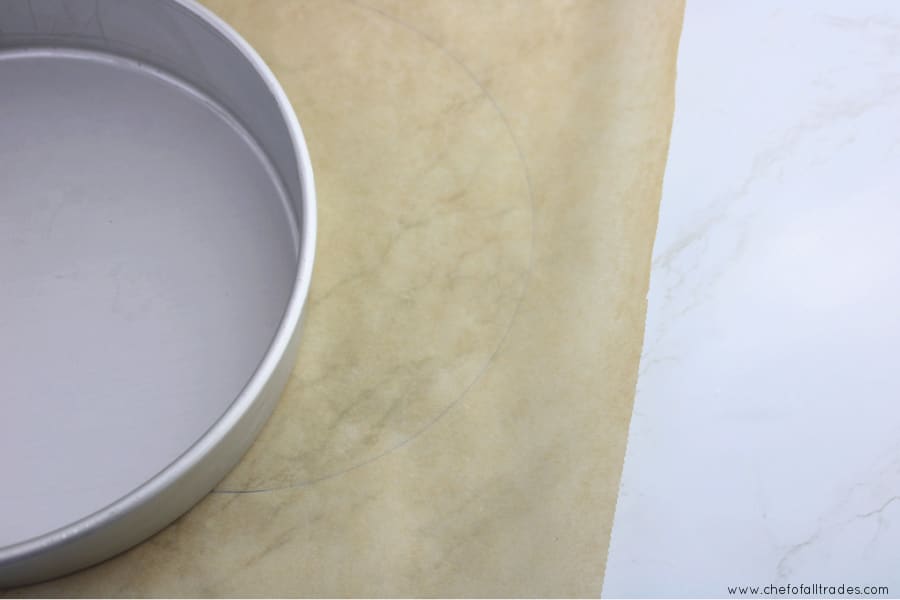
Preheat the oven to 350° then prepare your cheesecake pan.
Place your pan on the parchment paper and trace around the base of the cake pan with a pen or pencil.
Fold the circle in half and cut it out.

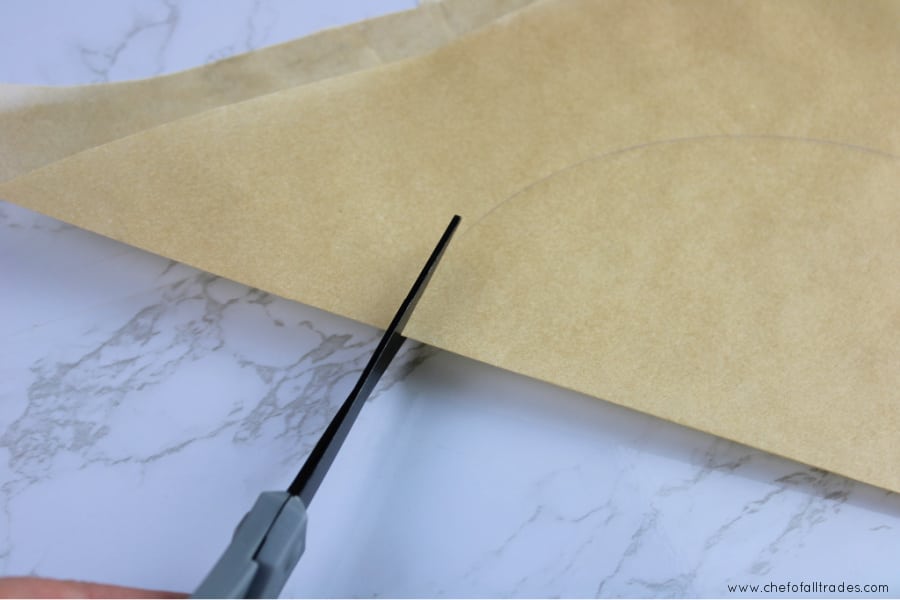
Place the parchment circle in the cake pan.

Step Two
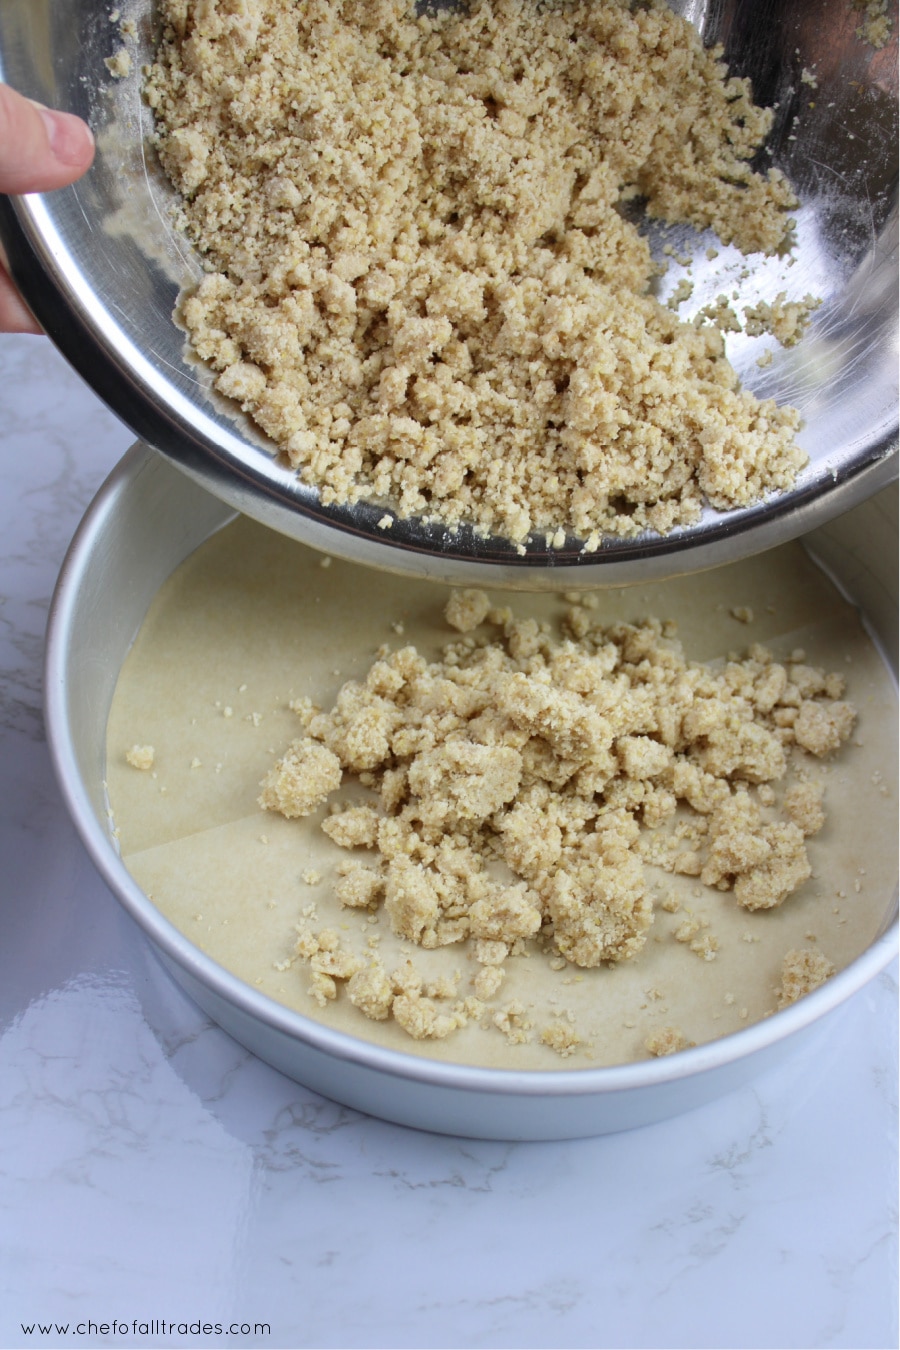
Mix together all the ingredients for the crust until the baking blend is completely saturated with the butter. Pour the mixture into the cake pan on top of the parchment. I like to use the back of a measuring cup to level, flatten and compact the crust.
Bake the crust for 15-20 mins until lightly brown.

Step Three
Fit the stand mixer with the paddle attachment and combine the cream cheese and the gentle sweet. Let the mixture whip for about 10 minutes until the cream cheese is light and airy. Scrape the bowl with a rubber spatula.
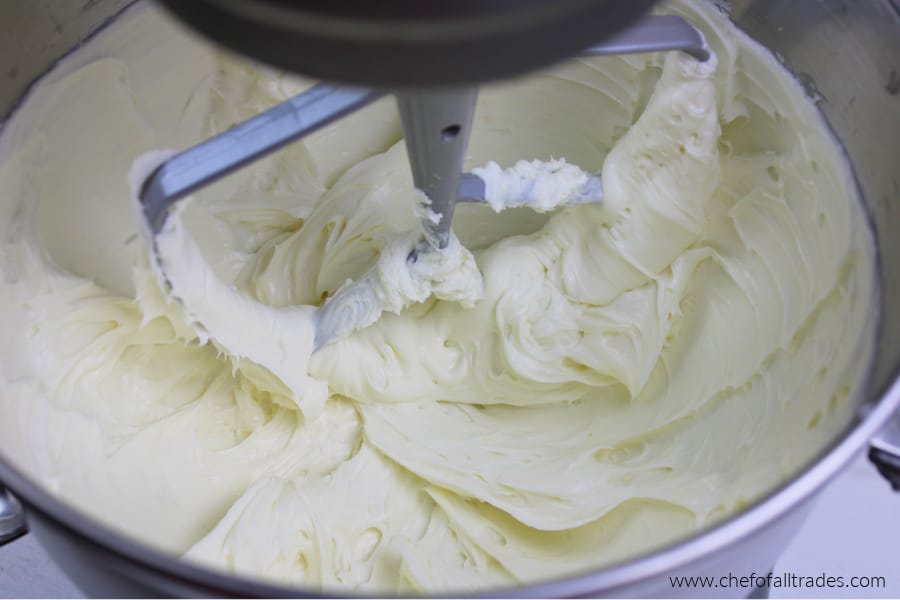
Step Four
Add the sour cream, xanthan gum, lemon juice & vanilla extract to the cream cheese mixture. Mix until everything is completely incorporated. Scrape the bowl then add the eggs one at a time, waiting until each one is combined before adding the next.
Scrape the bowl.
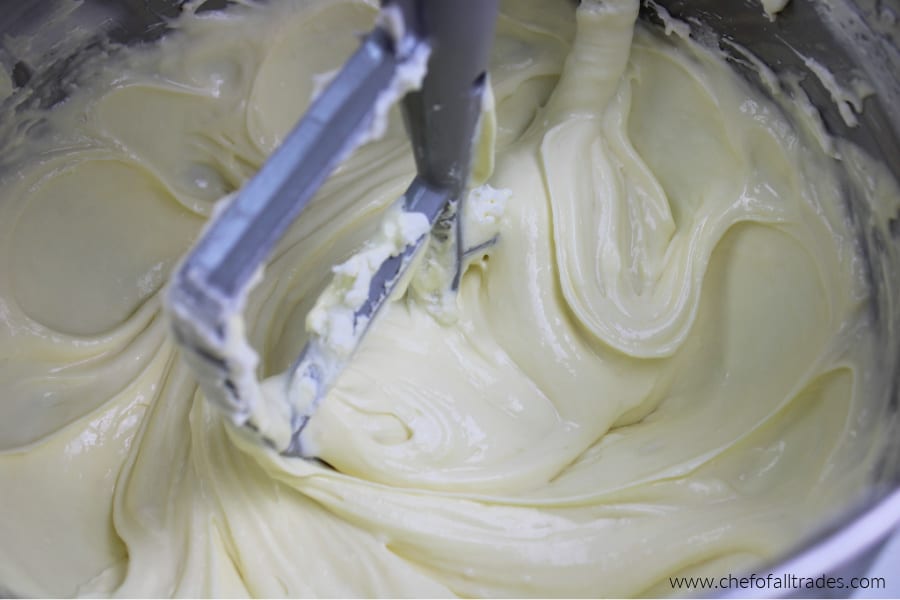
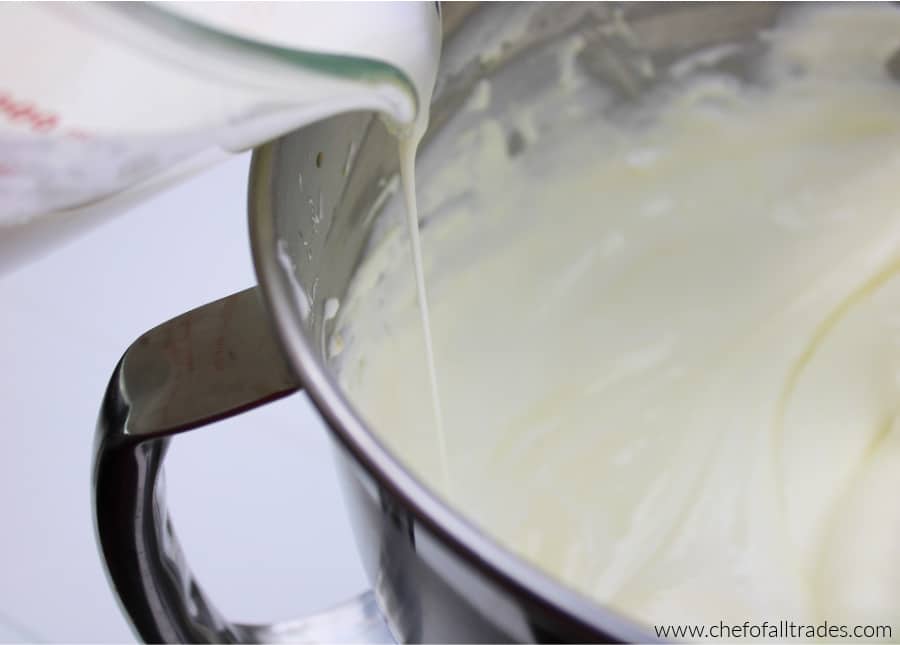
Step Five
Slowly add the heavy cream to the mixing bowl while the mixer is on a low speed. Scrape the bowl and mix again. Whip it on medium-high speed until batter is smooth and clump-free.
Step Six
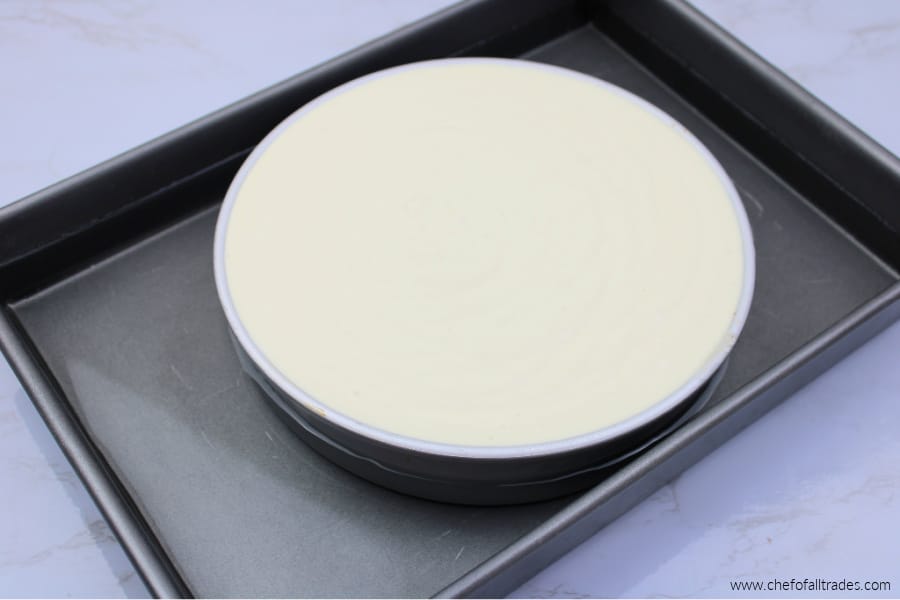
Pour the cheesecake batter over the crust and gently tap the pan on the counter to remove any excess bubbles.
This cheesecake is baked in a Bain Marie which is just a fancy way of saying water bath. Place the 9×13 casserole pan on the middle rack of the oven and put the cheesecake in the middle. Fill the casserole dish with water until the water is about ½ way up the cheesecake pan.
Bake for 1 ½ hours. You will know it’s done when the cheesecake is only slightly jiggly. You can also stick a toothpick in it until it comes out clean.
If you notice that the cheesecake is getting too brown, you can place a tented piece of aluminium foil over it making sure you don’t touch the top of the cheesecake.
Step Seven
Remove the cheesecake from the oven leaving the casserole dish and water in the oven to cool. It’s easier to dump the water out when it’s no longer hot. Allow the cheesecake to cool on the counter until it’s cool enough to get wrapped in plastic wrap and put in the freezer.
Allow the cheesecake to sit in the freezer for a few hours to set up. After a few hours in the freezer, remove the plastic wrap and run a butter knife or small metal spatula between the cake pan and the cheesecake.
Make sure you don’t saw it up and down, instead move the knife or spatula smoothly all the way around the outside. Put the plastic wrap loosely over the top of the cheesecake, this will prevent the top from sticking to the plate that you turn the cheesecake out onto.
Put a plate on top of the cheesecake and flip the pan upside down to get the cheesecake out of the pan. When it falls out it will be upside down so you will need another plate on the bottom of the cheesecake to flip it right side up.
Once the cheesecake is right side up you can rewrap it and put it in the fridge.
Step Eight
There are many ways you can do this step without making a huge mess. I used some parchment paper on a cookie sheet with the cooling rack on top of that.
You could also use parchment paper and a can of food. Place the parchment paper down and the can of food on top of that. Make sure you use a cake board or something similar to support the cheesecake before placing it on top of the can and that it’s centered so it doesn’t fall.
Place the cheesecake on the cooling rack or can.
Whichever way you choose to do it, it’s important to have this set up before you start making the ganache. You can’t leave the ganache sitting around, it needs to be used as soon as it’s ready or it will set up and be too thick to pour.
Step Nine
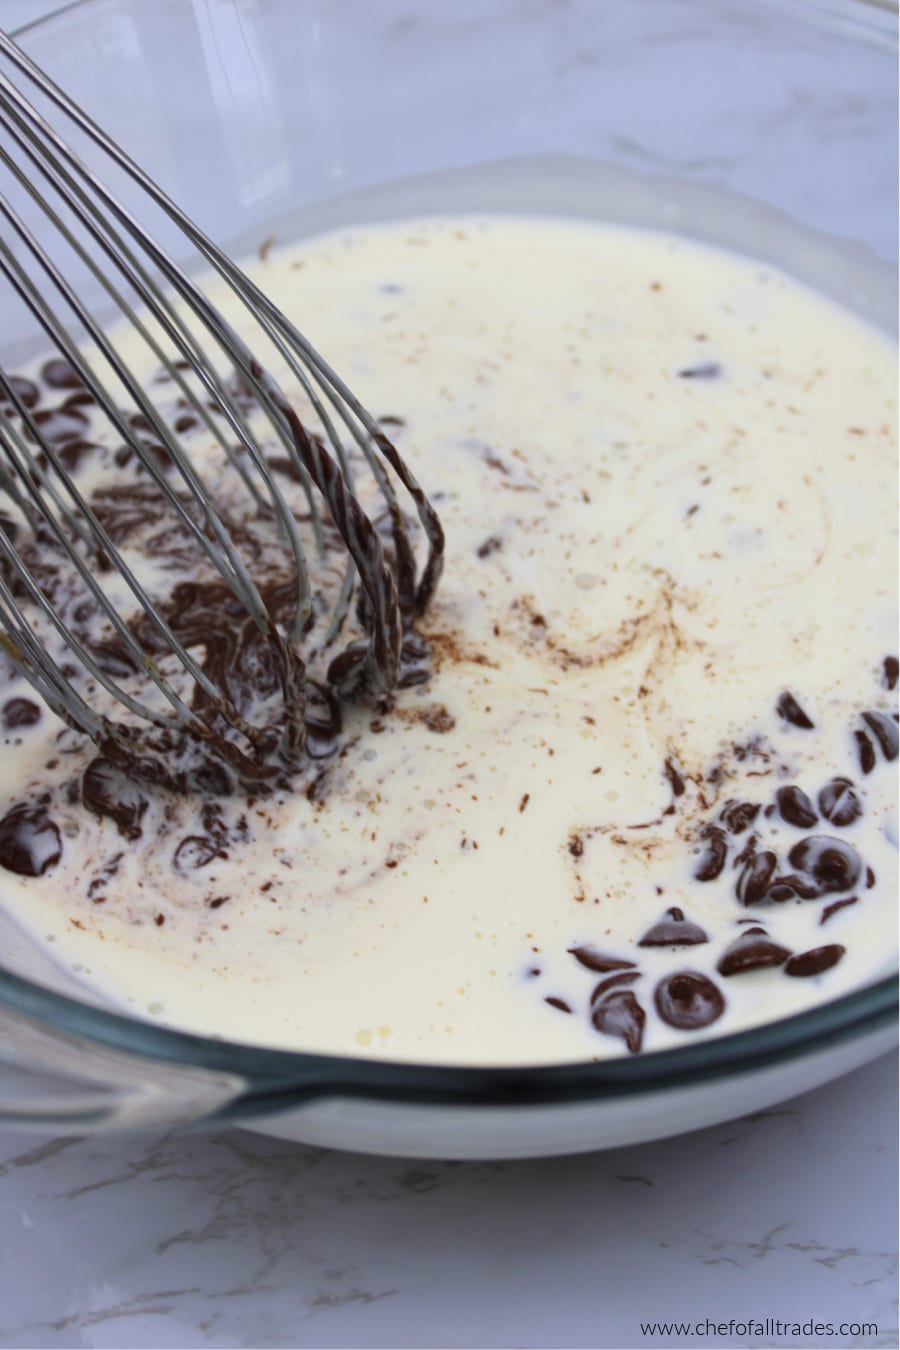
It’s ganache time!! Place the chocolate chips in a glass bowl and put the heavy cream and butter in a small saucepan then heat on the stove.
Make sure you keep stirring the heavy cream so it doesn’t burn. Once it is heated pour it over the chocolate chips and whisk until it’s completely combined.
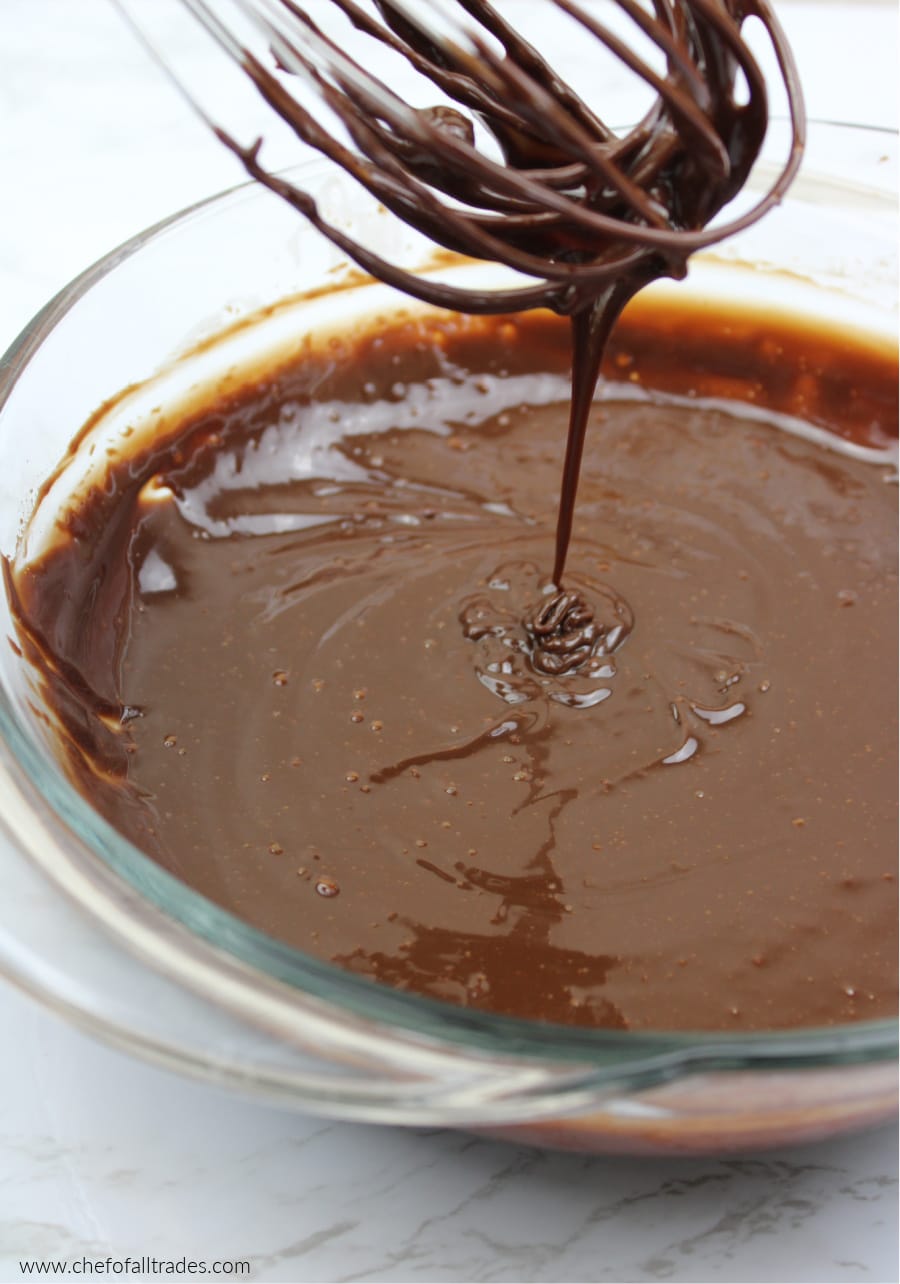
If the chips don’t melt completely, feel free to microwave them for 10 seconds at a time, stirring in between each time. That’s why we put the chocolate chips in a glass bowl so you can melt them in the microwave if needed.
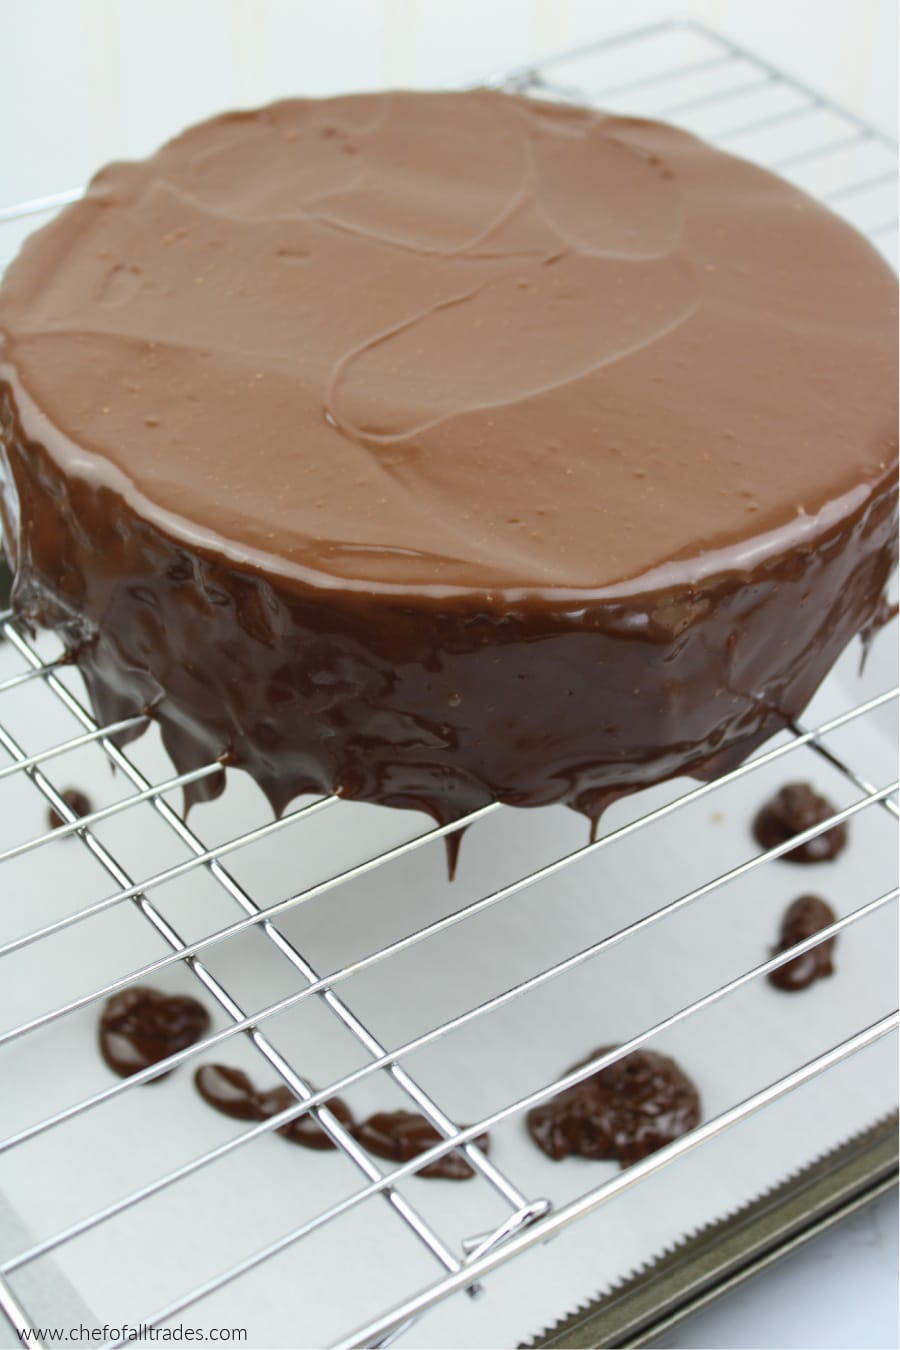
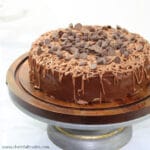
Pour the ganache over the cheesecake and allow to run over the sides. If the ganache isn’t running over the side feel free to use a butter knife or spatula to spread it over.
Step 10
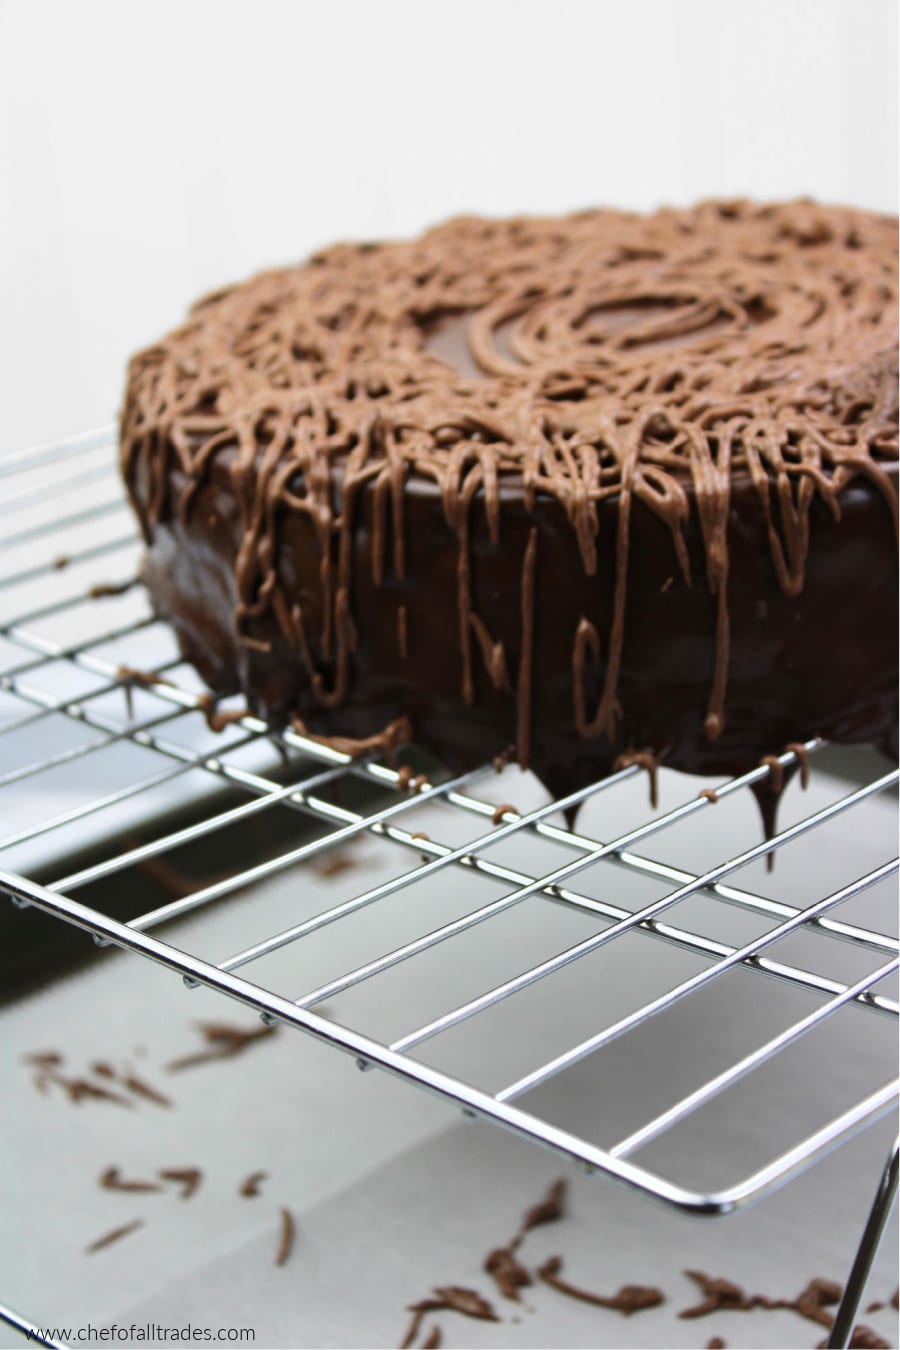
This step is optional because it’s decorative. I used the leftover ganache from the bowl and the small amount that fell onto the parchment paper and put it in the mixing bowl and whipped it until it lightened up slightly.
Put the whipped ganache in a piping bag (you could also use a ziploc bag) and cut a small hole in the bag. Pipe it all over the top of the cheesecake allowing some to fall over the sides.
Finish by sprinkling the ½ cup of chocolate chips over the top.
Step Eleven
Keep the cheesecake covered and refrigerated. Enjoy!
One way to make this cheesecake even more delicious is to use Sugar-Free & Gluten-Free Chocolate Chip Cookie Recipe as a crust!! YUMMY!!
Printable Recipe for Easy Cheesecake:
Easy Cheesecake Recipe (Sugar Free & Gluten Free)
Equipment
- Stand Mixer
- 8 inch Cake Pan
- 9x13 Casserole Pan
- Parchment Paper
Ingredients
Crust:
- 1 cup Baking Blend
- 3 tbsp Gentle Sweet
- 6 tbsp Melted Butter
Cheesecake:
- 1 ½ lbs ⅓ Less Fat Cream Cheese
- 1 cup Gentle Sweet
- ¼ cup Sour Cream
- ½ tsp Xanthan Gum
- 1 tbsp Lemon Juice
- 2 tsp Vanilla Extract
- 3 Eggs
- 2 ½ Cups Heavy Cream
Ganache:
- 1 bag Lily’s Milk Chocolate Chips + an optional ½ cup to top decorate the cheesecake
- ¾ cup Heavy Cream
- 1 tbsp Butter
Instructions
- Preheat the oven to 350° then prepare your cheesecake pan. Place your pan on the parchment paper and trace around the base of the cake pan with a pen or pencil. Fold the circle in half and cut it out. Place the parchment circle in the cake pan.
- Mix together all the ingredients for the crust until the baking blend is completely saturated with the butter. Pour the mixture into the cake pan on top of the parchment. I like to use the back of a measuring cup to level, flatten and compact the crust. Bake the crust for 15-20 mins until lightly brown.
- Fit the stand mixer with the paddle attachment and combine the cream cheese and the gentle sweet. Let the mixture whip for about 10 minutes until the cream cheese is light and airy. Scrape the bowl with a rubber spatula.
- Add the sour cream, xanthan gum, lemon juice & vanilla extract to the cream cheese mixture. Mix until everything is completely incorporated. Scrape the bowl then add the eggs one at a time, waiting until each one is combined before adding the next. Scrape the bowl.
- Slowly add the heavy cream to the mixing bowl while the mixer is on a low speed. Scrape the bowl and mix again. Whip it on medium-high speed until batter is smooth and clump-free.
- Pour the cheesecake batter over the crust and gently tap the pan on the counter to remove any excess bubbles. This cheesecake is baked in a Bain Marie which is just a fancy way of saying water bath. Place the 9x13 casserole pan on the middle rack of the oven and put the cheesecake in the middle. Fill the casserole dish with water until the water is about ½ way up the cheesecake pan. Bake for 1 ½ hours. You will know it’s done when the cheesecake is only slightly jiggly. You can also stick a toothpick in it until it comes out clean. If you notice that the cheesecake is getting too brown, you can place a tented piece of aluminium foil over it making sure you don’t touch the top of the cheesecake.
- Remove the cheesecake from the oven leaving the casserole dish and water in the oven to cool. It’s easier to dump the water out when it’s no longer hot. Allow the cheesecake to cool on the counter until it’s cool enough to get wrapped in plastic wrap and put in the freezer. Allow the cheesecake to sit in the freezer for a few hours to set up. After a few hours in the freezer, remove the plastic wrap and run a butter knife or small metal spatula between the cake pan and the cheesecake. Make sure you don’t saw it up and down, instead move the knife or spatula smoothly all the way around the outside. Put the plastic wrap loosely over the top of the cheesecake, this will prevent the top from sticking to the plate that you turn the cheesecake out onto. Put a plate on top of the cheesecake and flip the pan upside down to get the cheesecake out of the pan. When it falls out it will be upside down so you will need another plate on the bottom of the cheesecake to flip it right side up. Once the cheesecake is right side up you can rewrap it and put it in the fridge.
- There are many ways you can do this step without making a huge mess. I used some parchment paper on a cookie sheet with the cooling rack on top of that. You could also use parchment paper and a can of food. Place the parchment paper down and the can of food on top of that. Make sure you use a cake board or something similar to support the cheesecake before placing it on top of the can and that it’s centered so it doesn’t fall. Place the cheesecake on the cooling rack or can. Whichever way you choose to do it, it’s important to have this set up before you start making the ganache. You can't leave the ganache sitting around, it needs to be used as soon as it’s ready or it will set up and be too thick to pour.
- It’s ganache time!! Place the chocolate chips in a glass bowl and put the heavy cream and butter in a small saucepan then heat on the stove. Make sure you keep stirring the heavy cream so it doesn’t burn. Once it is heated pour it over the chocolate chips and whisk until it's completely combined. If the chips don’t melt completely, feel free to microwave them for 10 seconds at a time, stirring in between each time. That’s why we put the chocolate chips in a glass bowl so you can melt them in the microwave if needed. Pour the ganache over the cheesecake and allow to run over the sides. If the ganache isn’t running over the side feel free to use a butter knife or spatula to spread it over.
- This step is optional because it’s decorative. I used the leftover ganache from the bowl and the small amount that fell onto the parchment paper and put it in the mixing bowl and whipped it until it lightened up slightly. Put the whipped ganache in a piping bag (you could also use a ziploc bag) and cut a small hole in the bag. Pipe it all over the top of the cheesecake allowing some to fall over the sides. Finish by sprinkling the ½ cup of chocolate chips over the top.
- Keep the cheesecake covered and refrigerated. Enjoy!
I don’t know if the amounts in recipe are wrong, but I baked this in a 9-inch springform, and it never got done in the middle, was like a lumpy cottage cheese texture and burned on top, then overflowed the pan. How could this work in an 8-inch pan???
Hi Melissa! I’m sorry to hear that your cheesecake didn’t turn out. I use Wilton cake pans which have pretty high sides about 2 1/2 inches. I’m not sure how tall your spring form pan is so that may have made a difference. I have never had the texture come out like cottage cheese. The only thing I can think of is using a rubber spatula to scrape the sides down. I have to do this probably 4-7 times throughout the process to make sure everything is well incorporated and mixed together. Once all of the ingredients are added to the batter I mix it on the highest speed I can without flinging it everywhere just to make sure all of the lumps are out.
You said you cooked it in a spring form pan, does that mean you did not use the water bath ? That makes a big difference in cooking temps and times if you don’t use a water bath. If you did use a water bath how did you prevent the water from getting inside your pan?
Sorry for all the questions. I want to make sure I give you the best information possible. I look forward to hearing from you! Have a good day.