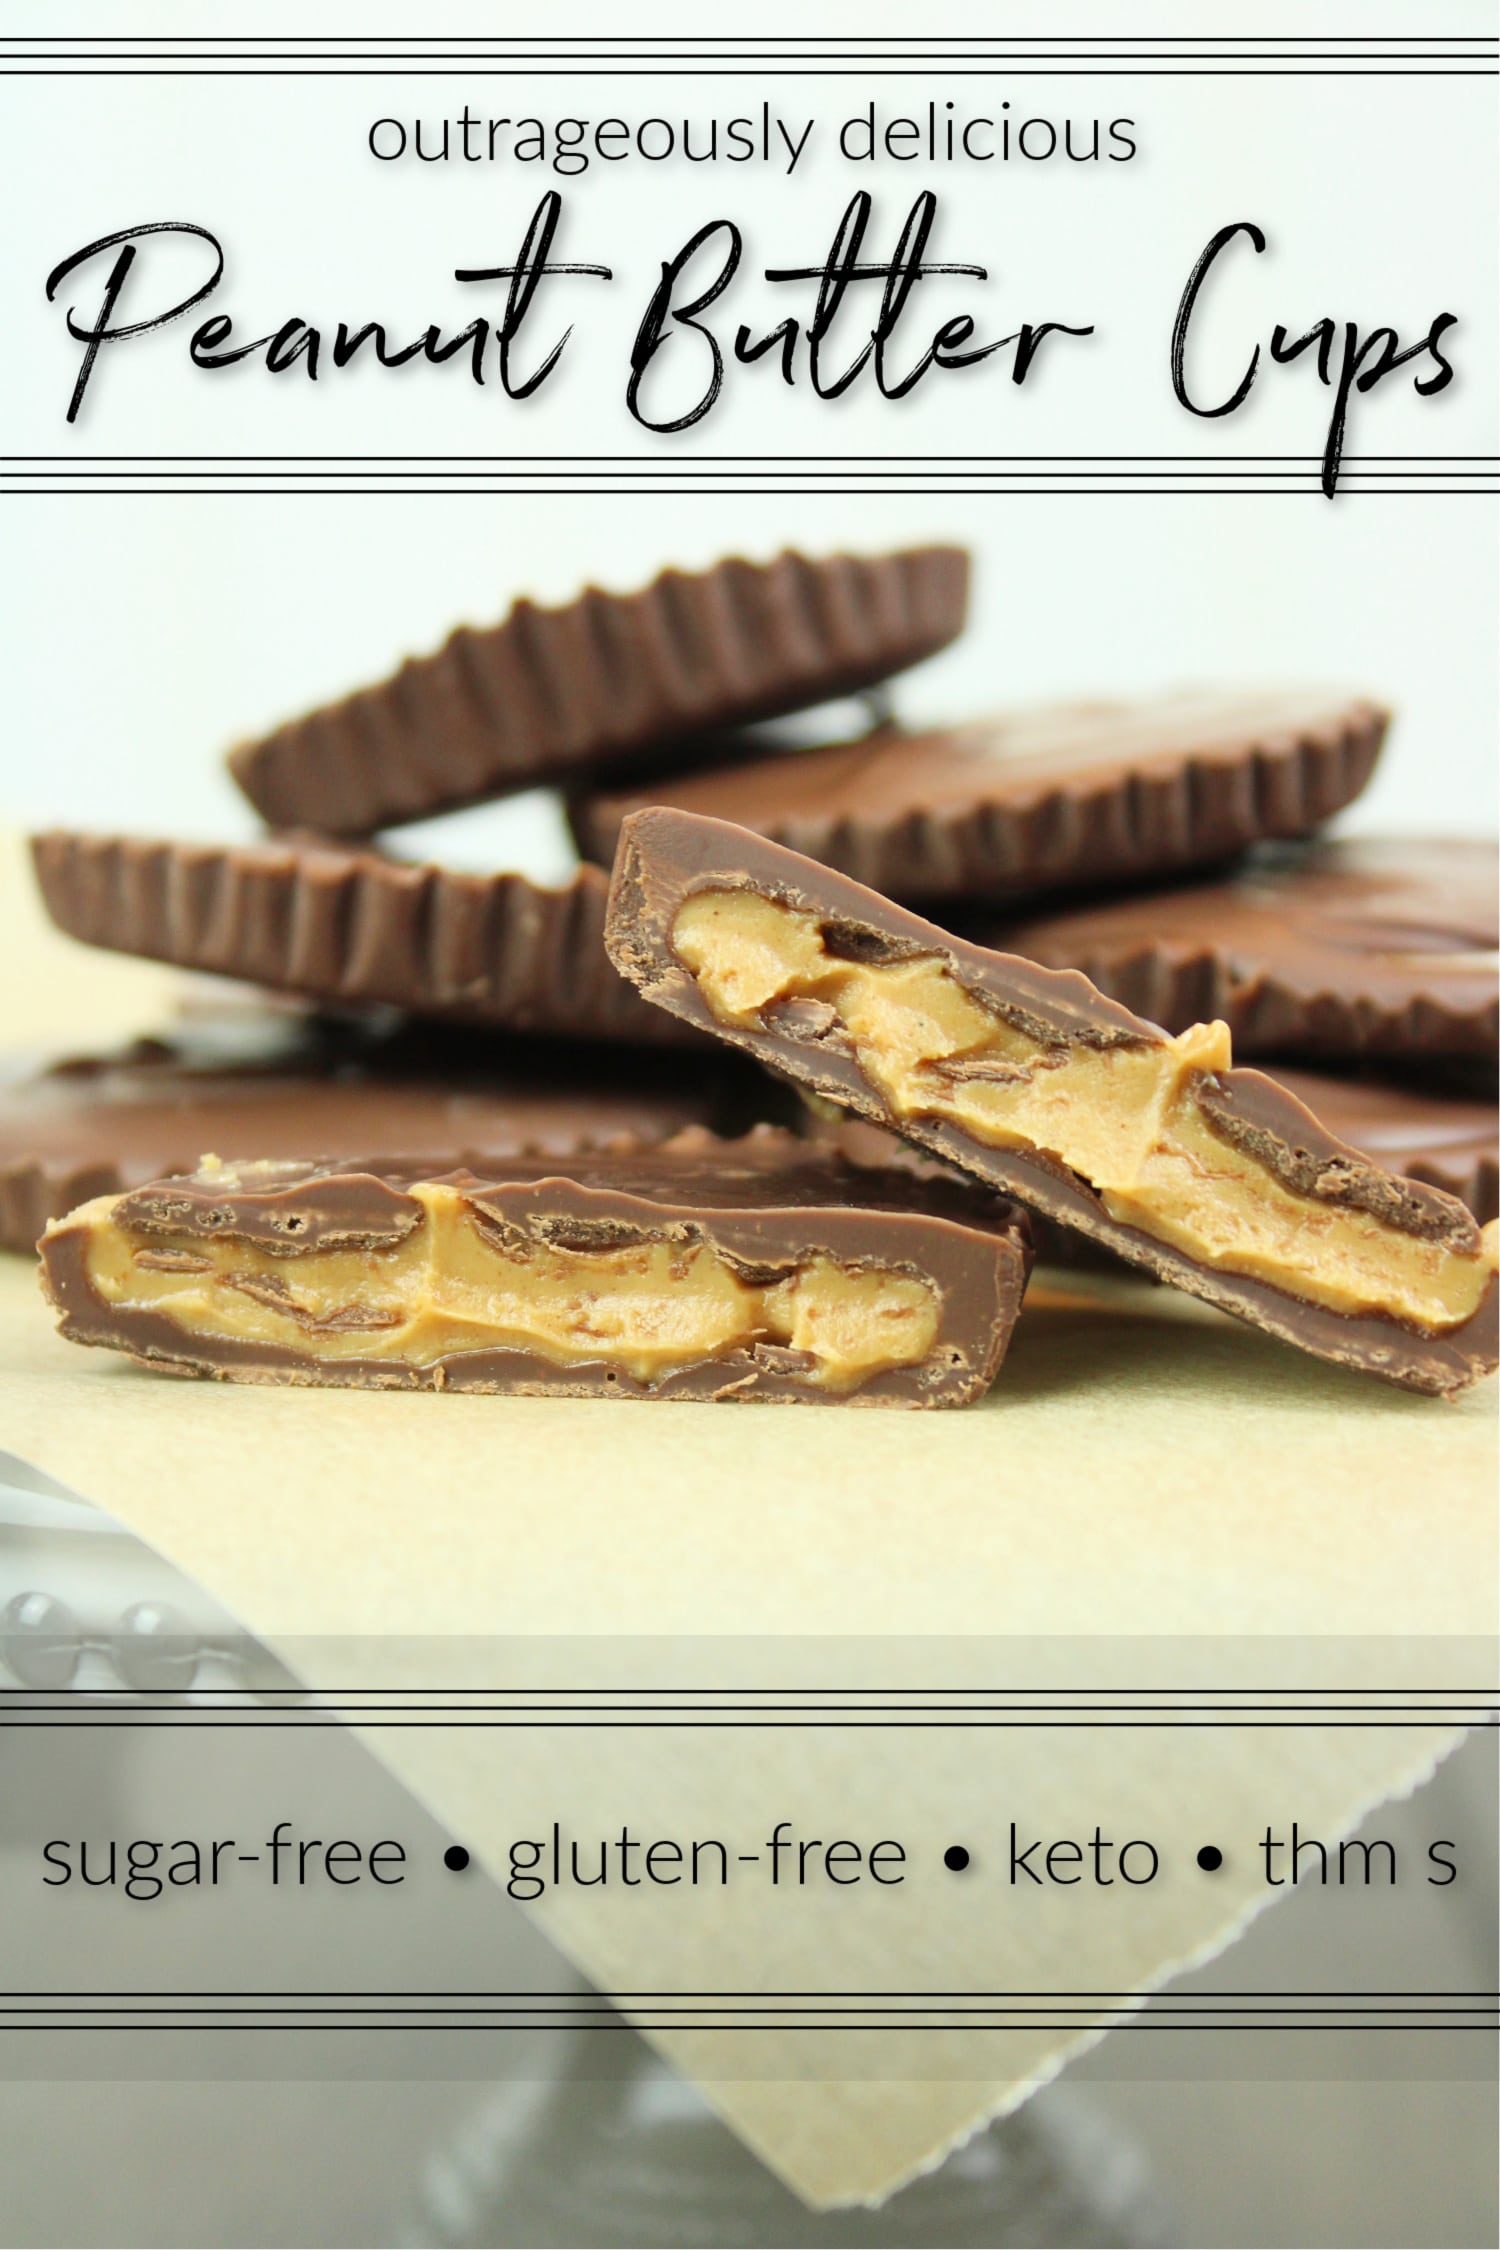
Use this recipe to make the most delicious sugar free peanut butter cups. With only 2 ingredients they super simple to make and will save a TON of money.
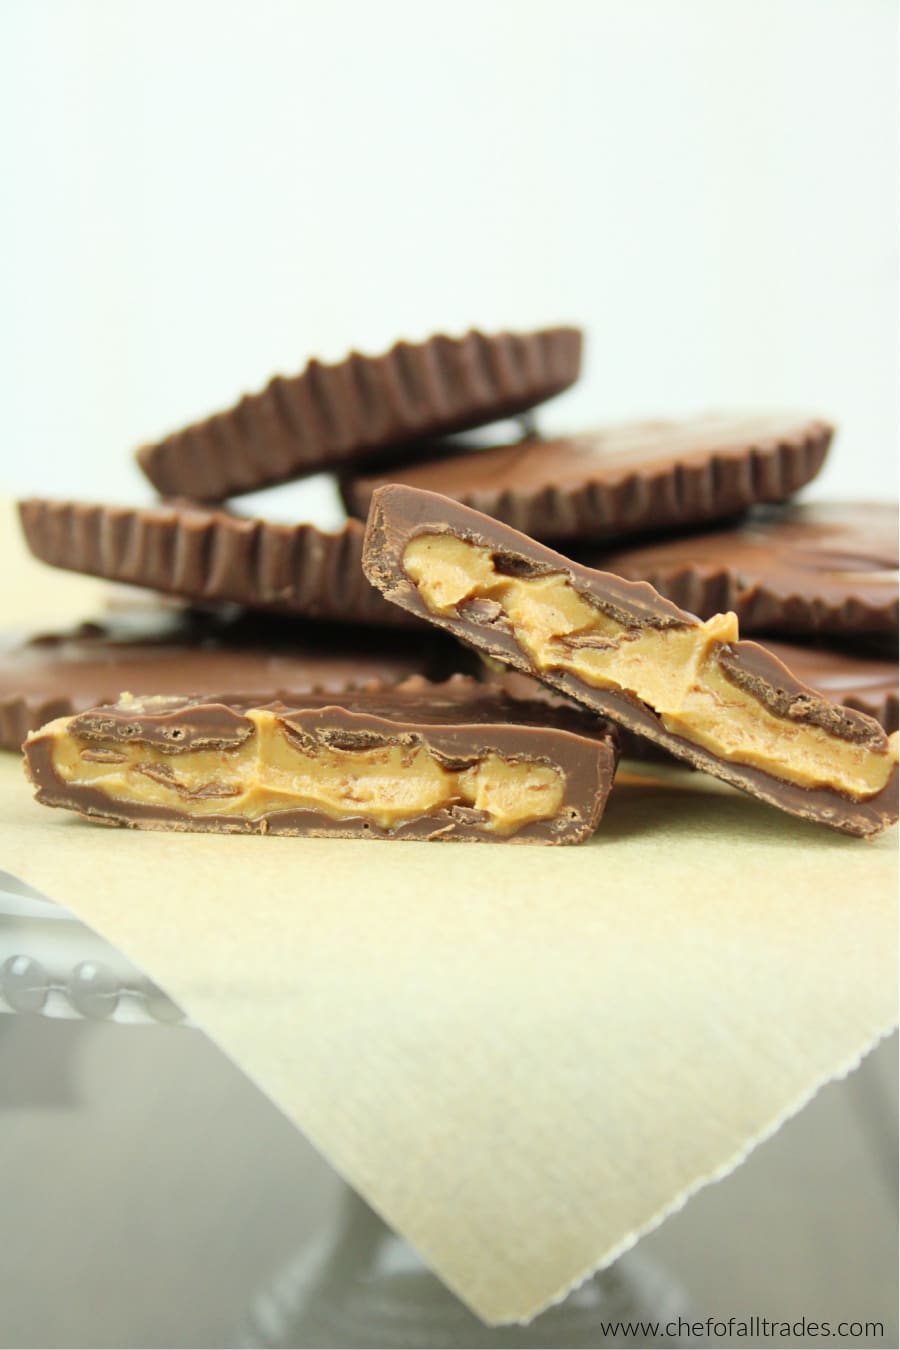
Peanut butter cups are one of my all time favorite candies. When my family and I decided to cut out sugar it was one of the things I craved the most after meal time. For along time there were no options and once one came along, as you can imagine, they were very expensive.
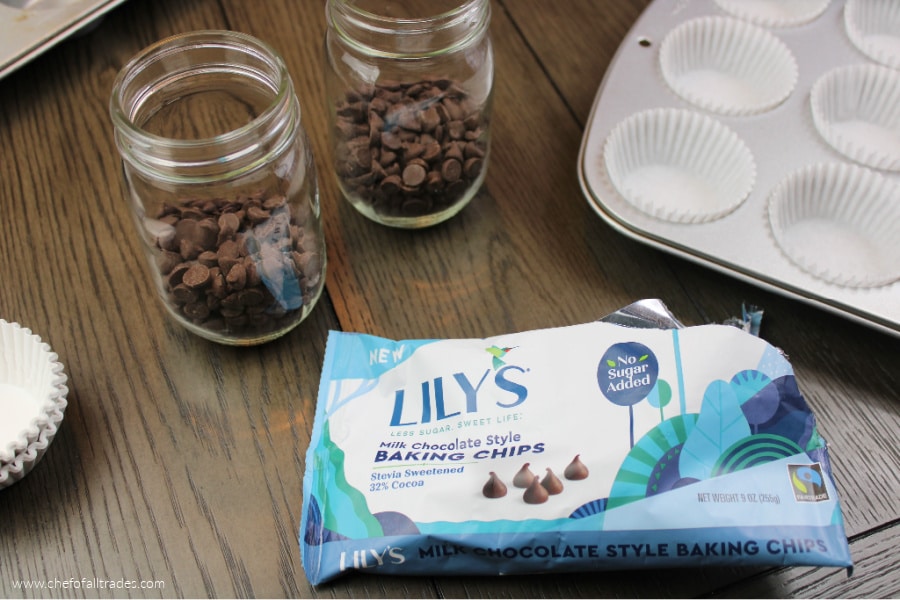
With the price tag out of the question for the budget, I turned to good old DIY. I picked up my favorite sugar-free chocolate chips and the BEST, I repeat BEST sugar-free peanut butter that exists, JIF.
It’s sold at Target, some Walmarts, and regular grocery stores. It doesn’t separate, it’s not grainy, it is delicious. It tastes just like the real thing and is affordable. Lily Chocolate Chips are sold pretty much everywhere that I’ve ever shopped but I’ve link both products below in the ingredients list if you prefer to buy them from amazon.
The most exciting part is the price. At Whole Foods a 2 pack of sugar free peanut butter cups are $2.49 making them about $1.25 per peanut butter cup. This recipe makes 14 peanut butter cups for about $8.00 which is about $.57 per sugar free peanut butter cup!
That is a huge difference in price and with how easy they are to make, there’s just no reason not to do it yourself. I’ve taught my girls how to make the so they do it while I’m cooking dinner. It’s glorious and I highly recommend it!
Pro-Tips
- I don’t like a peanut butter cup with thick chocolate so I prefer to make the tops and bottoms pretty thin, if you like them to be thicker just know the recipe will yield fewer peanut butter cups.
- Don’t overheat the chocolate when melting. Chocolate has something called a temper and if you break the temper it will not resolidify.
- You don’t have to use piping bags, you can use zipper bags instead but make sure you double up the zipper bags for the peanut butter. It will blow out a single zipper bag.
Sugar-Free Peanut Butter Cups
Yield:
About 14 peanut butter cups
Tools:
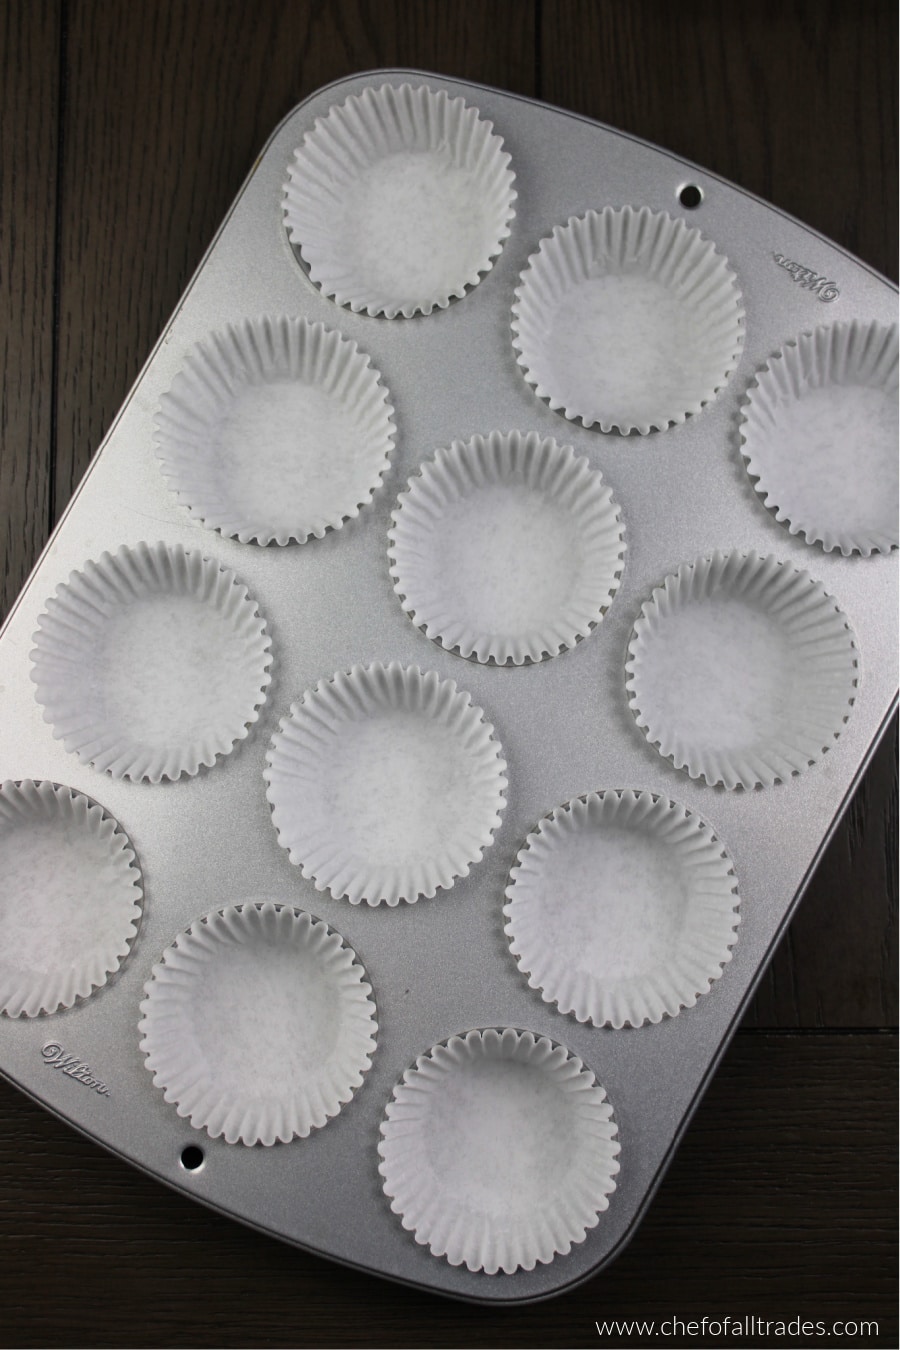
Muffin Tin
Cupcake Papers
Piping Bags or Ziploc Bags
Ingredients:
1 bag – Lily’s Chocolate Chips (Milk or Dark is fine)
1-2 tbsps – JIF Sugar-Free Peanut Butter
Instructions
Step One
Clear a spot in your fridge to put the muffin tin. Line the muffin tin with the cupcake papers.
Step Two
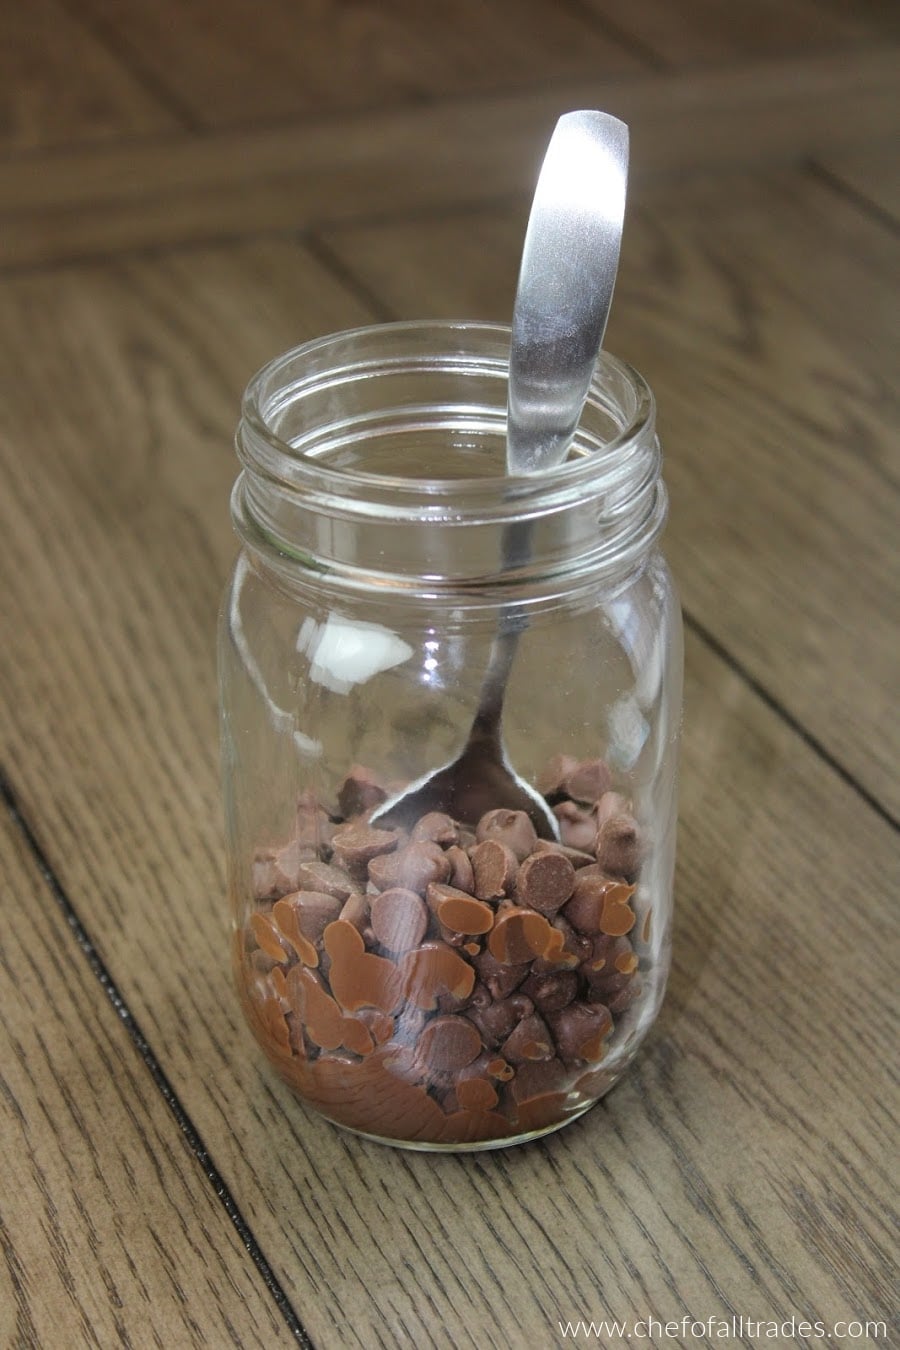
Divide the chocolate into 2 small containers. I prefer to use 16oz mason jars for this step but you can use whatever you have on hand.
It will take more chocolate to cover the top than it will to make the bottoms. If you have a kitchen scale you want about 4 oz for the bottoms and about 5 oz for the tops.
If you don’t have a kitchen scale just eyeball it making sure there is slightly more in one container and set that one aside.
Step Three
Place the smaller amount of chocolate in the microwave for 15 seconds then stir. Put it back in the microwave for 10 seconds at a time, stirring between each time. Repeat until the chocolate is completely melted. This is where you want to be careful not to overheat it.
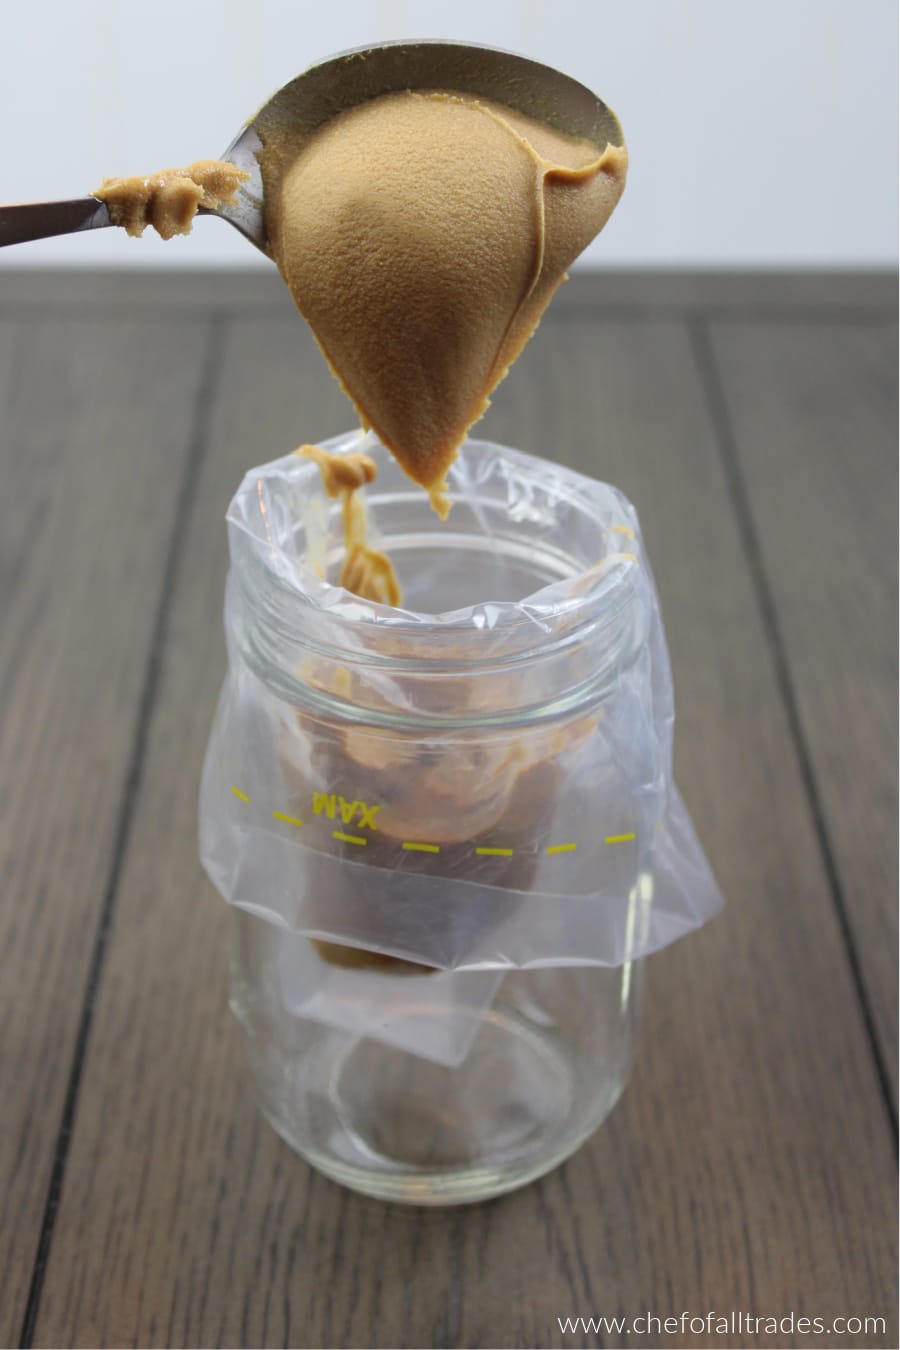
If you’ve never filled a pastry bag it can be kind of intimidating and messy. The easiest way to do it is to put the bag in a mason jar or drinking glass and fold it over the top. See picture below.
Pour the melted chocolate into the pastry bag, scraping out the excess. Remove the filled pastry bag from the mason jar and twist the top until it’s closed tightly. Snip the tip off of the end of the bag.

Step Four
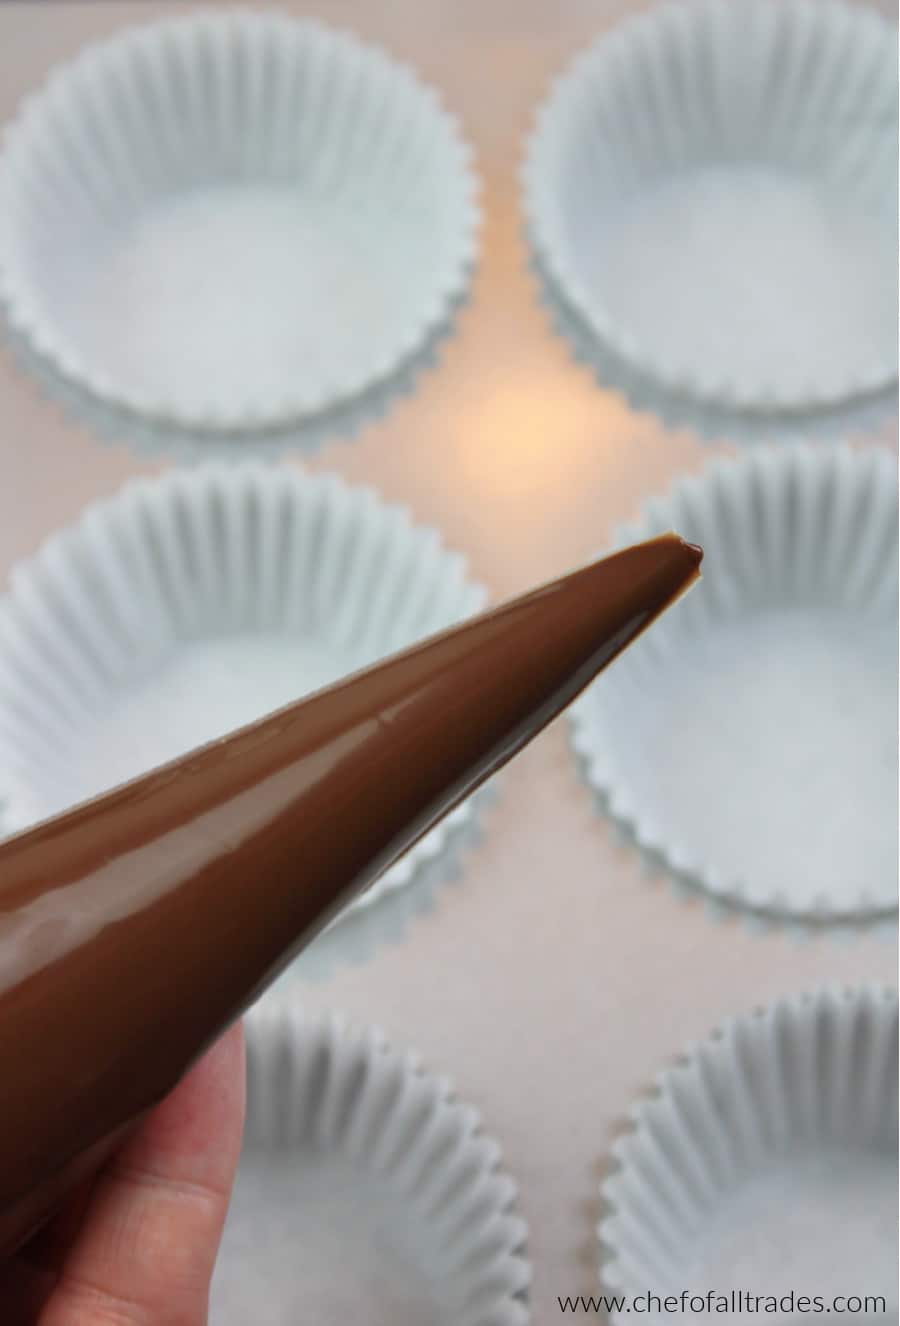
Pipe a border around the inside edge of each cupcake paper. This step makes the sides a bit higher so the peanut butter doesn’t come out. Fill in the bottom with a thin layer of chocolate using the tip of the piping bag to spread the chocolate around making sure there are no holes.
Refrigerate for 5 mins or until hard.

Step Five
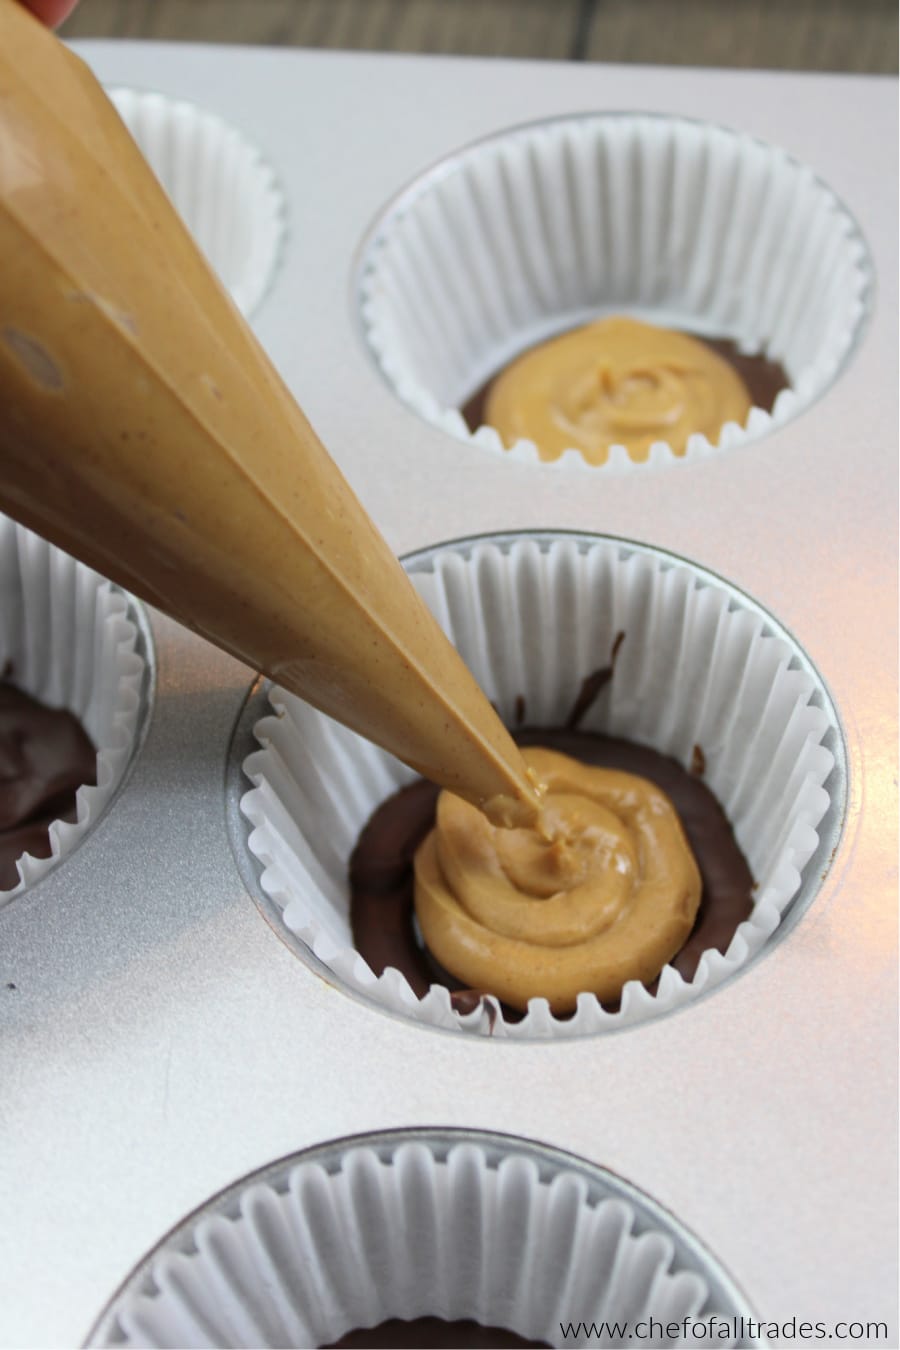
Fill another bag with the 1-2 tbsps of peanut butter. The amount really depends on how much you love peanut butter. Remove the bottoms from the refrigerator and pipe a spiral of peanut butter starting in the center and moving outward leaving a small border to allow the tops to seal with the bottoms.
Step Six
Melt the larger amount of chocolate and place in a piping bag according to Step 3.
Step Seven
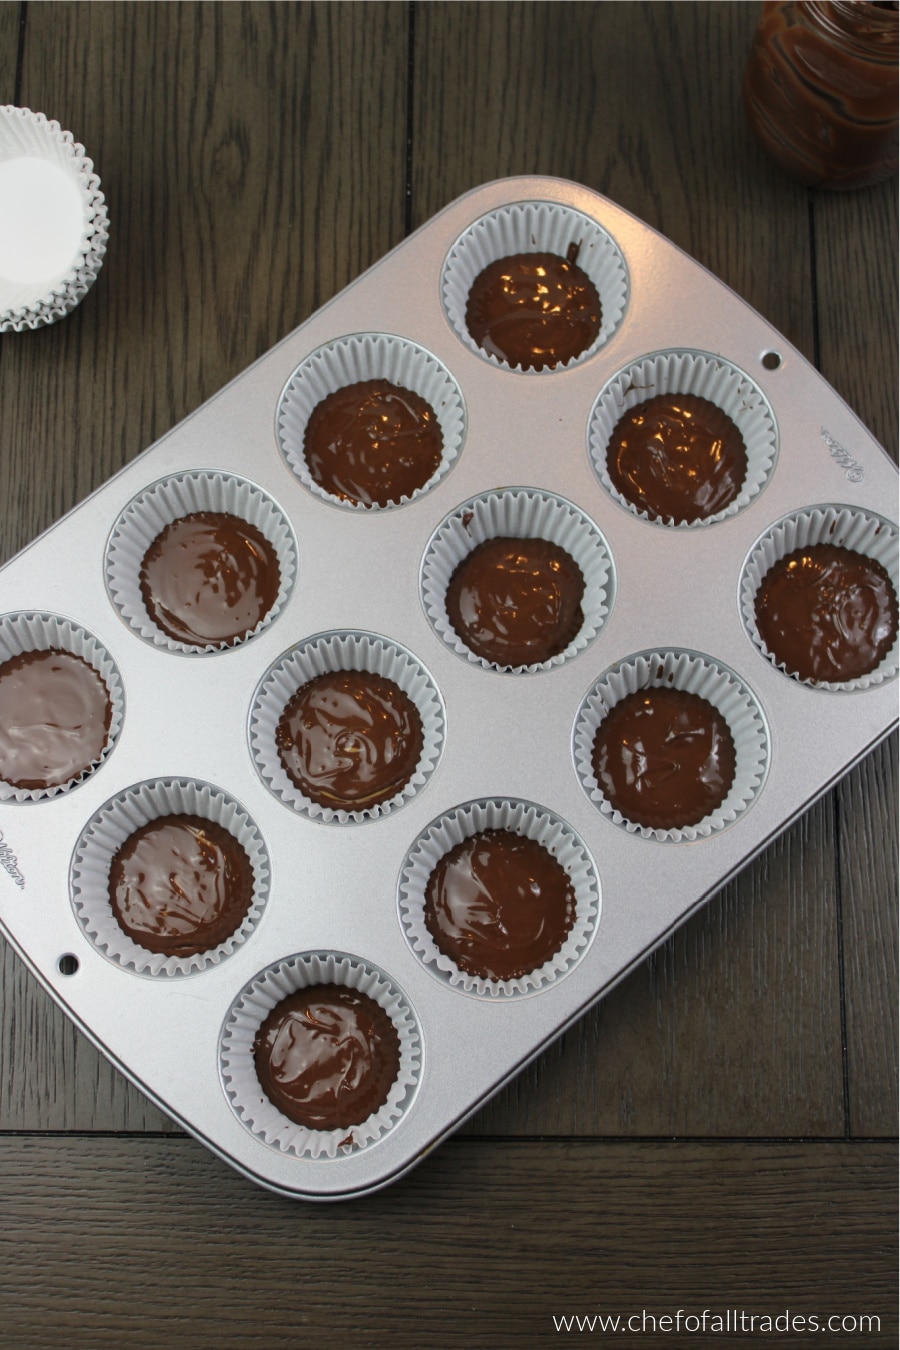
Pipe the chocolate around the outside of the peanut butter and continue in until the entire top is covered. Make sure you don’t pipe too much, a thin spotty layer will be enough once you stop squeezing the piping bag and use the tip to spread it around to fill in all the holes.
Put them in the refrigerator to set up then store them in a plastic zipper bag back in the fridge.
Need more sugar-free dessert ideas? Check of these delicious recipes from Chef of all Trades:
Edible Chocolate Chip Cookie Dough
Click the link for a complete list of sugar free recipes from Chef of All Trades!
Printable Recipe for Sugar-Free Peanut Butter Cups:

Sugar Free Peanut Butter Cups
Ingredients
- 1 bag Lily's Chocolate Chips Milk or Dark is fine
- 1-2 tbsp JIF Sugar-Free Peanut Butter
Instructions
- Clear a spot in your fridge to put the muffin tin. Line the muffin tin with the cupcake papers.
- Divide the chocolate into 2 small containers. I prefer to use 16oz mason jars for this step but you can use whatever you have on hand. It will take more chocolate to cover the top than it will to make the bottoms. If you have a kitchen scale you want about 4 oz for the bottoms and about 5 oz for the tops. If you don't have a kitchen scale just eyeball it making sure there is slightly more in one container and set that one aside.
- Place the smaller amount of chocolate in the microwave for 15 seconds then stir. Put it back in the microwave for 10 seconds at a time, stirring between each time. Repeat until the chocolate is completely melted. This is where you want to be careful not to overheat it. If you've never filled a pastry bag it can be kind of intimidating and messy. The easiest way to do it is to put the bag in a mason jar or drinking glass and fold it over the top. See picture below. Pour the melted chocolate into the pastry bag, scraping out the excess. Remove the filled pastry bag from the mason jar and twist the top until it's closed tightly. Snip the tip off of the end of the bag.
- Pipe a border around the inside edge of each cupcake paper. This step makes the sides a bit higher so the peanut butter doesn't come out. Fill in the bottom with a thin layer of chocolate using the tip of the piping bag to spread the chocolate around making sure there are no holes. Refrigerate for 5 mins or until hard.
- Fill another bag with the 1-2 tbsps of peanut butter. The amount really depends on how much you love peanut butter. Remove the bottoms from the refrigerator and pipe a spiral of peanut butter starting in the center and moving outward leaving a small border to allow the tops to seal with the bottoms.
- Melt the larger amount of chocolate and place in a piping bag according to Step 3.
- Pipe the chocolate around the outside of the peanut butter and continue in until the entire top is covered. Make sure you don't pipe too much, a thin spotty layer will be enough once you stop squeezing the piping bag and use the tip to spread it around to fill in all the holes. Put them in the refrigerator to set up then store them in a plastic zipper bag back in the fridge.
Leave a Reply