Use this recipe to make the best low-carb, sugar-free Buffalo Chicken Pizza. The perfectly crispy crust and melty cheese is the perfect way to satisfy your appetite while sticking to your diet plans.

This pizza is one of my favorite things to have for lunch or dinner. It makes me feel like I’m eating a cheat meal but because it’s sugar-free and low-carb it perfectly fits into my meal plans!
My girls love making and eating these pizzas. In fact, as I’m typing this one of daugthers is cuddled up with me on the couch and saw the picture. She’s asking if we could have them for lunch. I’m telling you, they will be a fan fav in your home too!
PRO-TIPS:
- If you have kids, get them involved in this. Kids love helping in the kitchen and are more experimental with trying new things if they had a hand in making it.
Buffalo Chicken Pizza
Yield:
6 Pizzas
Ingredients:
1 recipe – Instant Pot Shredded Chicken
1 recipe – Creamy Dill Ranch
¾ cup – Franks Red Hot Sauce
3 – 4 cups – Shredded Mozzarella Cheese
½ – Thinly Sliced Red Onion
6 – Mission Carb Balance Tortillas
Instructions:
1. Preheat the oven to 350°F. Place the tortillas in a single layer on a few baking sheets or pizza pans. Place in the oven for 5-6 mins, then flip and place in the oven for another 5-6 mins. Just until they start to become golden brown.

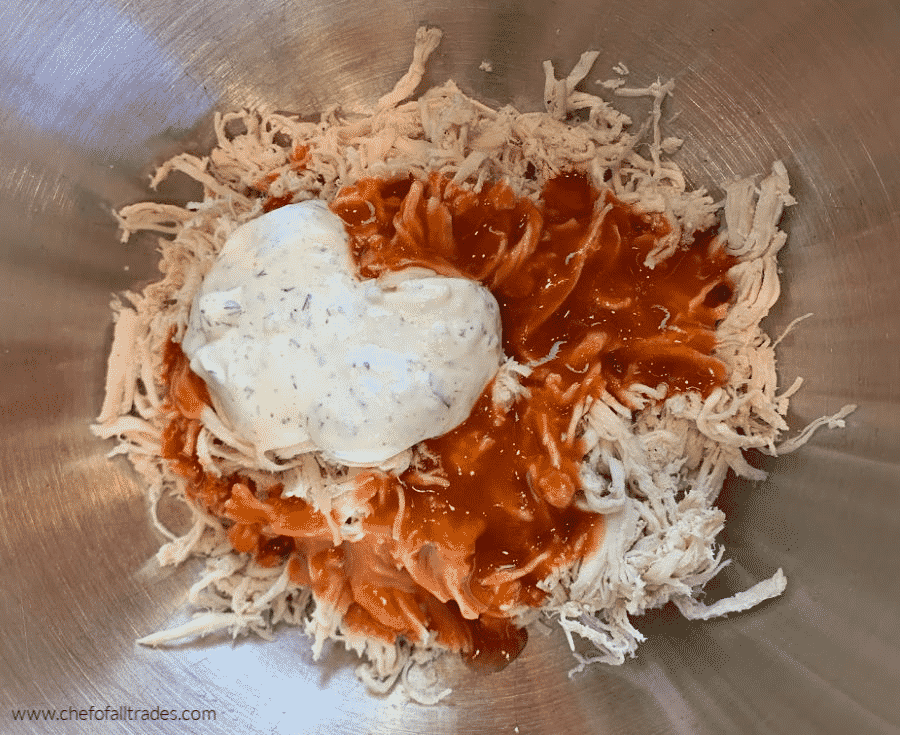
2. While the tortillas are toasting, mix all of the chicken, all of the franks red hot sauce and ¼ cup of creamy dill ranch together in a bowl until well combined.
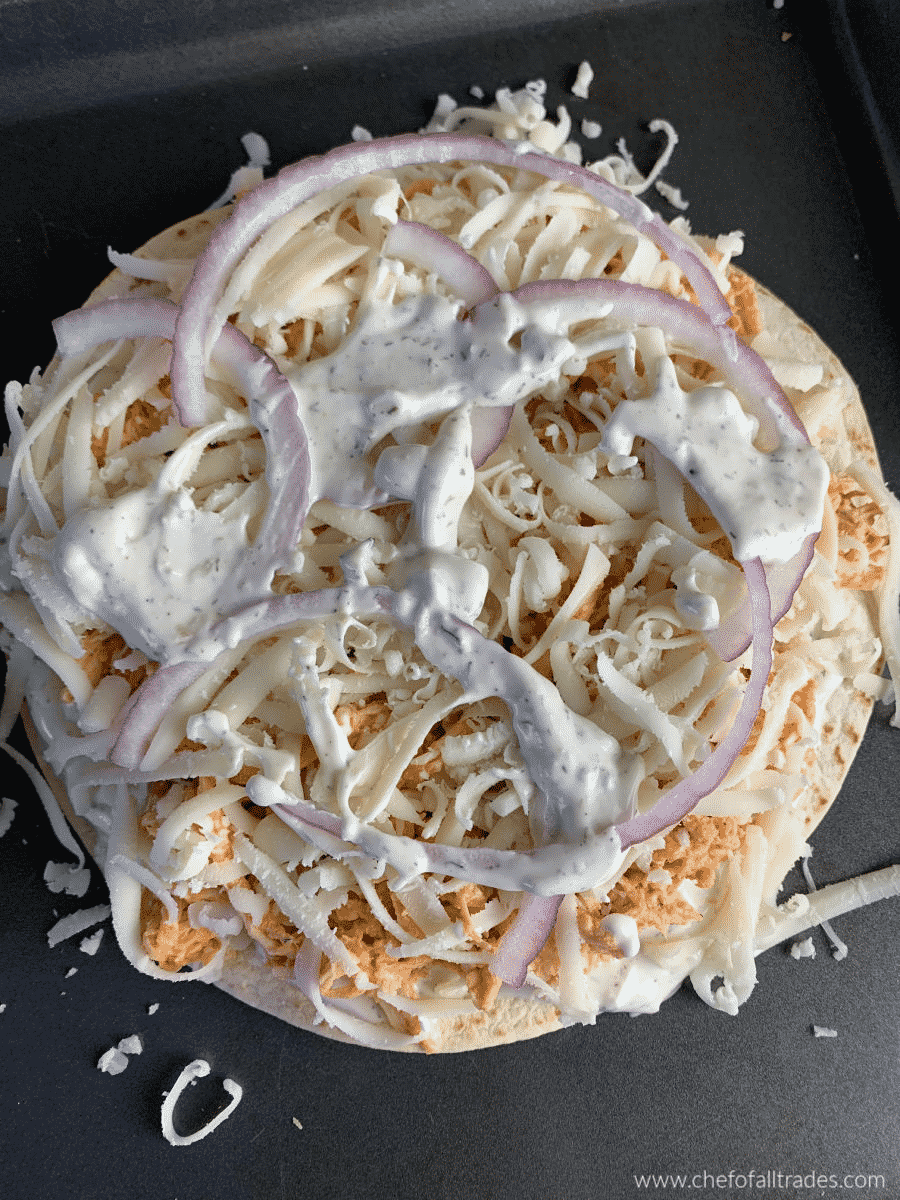
2. Let the tortillas cool until you can handle them. Be gentle because they are now crispy and a bit fragile. Spread 1 heaping tbsp of the Creamy Dill Ranch to within about a ¼ inch of the edge of the tortilla. Spread a heaping ½ cup of shredded mozzarella over the ranch then spread a heaping ½ cup of the buffalo chicken over the cheese. Add as may sliced red onions, extra ranch and cheese as you like to the top of the pizza.
3. Bake in the 350° oven for 10 mins, then switch the oven to a 500° broil and keep a close eye on it, they burn quickly on this setting. This step will add color and flavor to the top. I leave the pizza in the oven on that setting for 3-5 mins.
4. Remove them from the oven, cut and serve with some of my AMAZING Creamy Dill Ranch.

Click here for more great recipes from Chef of All Trades
Printable Recipe:
Buffalo Chicken Pizza
Ingredients
- 1 recipe Instant Pot Shredded Chicken
- 1 recipe Creamy Dill Ranch
- 3/4 cup Franks Red Hot Sauce
- 3-4 cups Shredded Mozzarella Cheese
- 1/2 Thinly Sliced Red Onion
- 6 Mission Carb Balance Tortillas
Instructions
- Preheat the oven to 350°F. Place the tortillas in a single layer on a few baking sheets or pizza pans. Place in the oven for 5-6 mins, then flip and place in the oven for another 5-6 mins. Just until they start to become golden brown.
- While the tortillas are toasting, mix all of the chicken, all of the franks red hot sauce and ¼ cup of creamy dill ranch together in a bowl until well combined.
- Let the tortillas cool until you can handle them. Be gentle because they are now crispy and a bit fragile. Spread 1 heaping tbsp of the Creamy Dill Ranch to within about a ¼ inch of the edge. Spread a heaping ½ cup of shredded mozzarella over the ranch then spread a heaping ½ cup of the buffalo chicken over the cheese. Add as may sliced red onions, extra ranch and cheese as you like to the top of the pizza.
- Bake in the 350° oven for 10 mins, then switch the oven to a 500° broil and keep a close eye on it, they burn quickly on this setting. This step will add color and flavor to the top. I leave the pizza in the oven on that setting for 3-5 mins.
- Remove them from the oven, cut and serve with some of my AMAZING Creamy Dill Ranch.
Leave a Reply